The first time I was invited to show photographs, I was asked to bring mounted prints. I had learned how to cut mats and mount photos a few decades earlier, but I hadn’t done it in at least twenty-five years. I didn’t really remember how and didn’t have any of the equipment I needed to do it.
I kind of panicked over the whole situation and never mounted any of my images. I showed up, sheepishly, with a half-dozen images in a display portfolio. Nobody said anything, but I still felt really awkward, so decided to re-learn how to mount photos for display.
For those of you who might be experiencing that same panic, have no fear. It’s actually a pretty straightforward process, and I’ll walk you through it.
Terminology and Basics
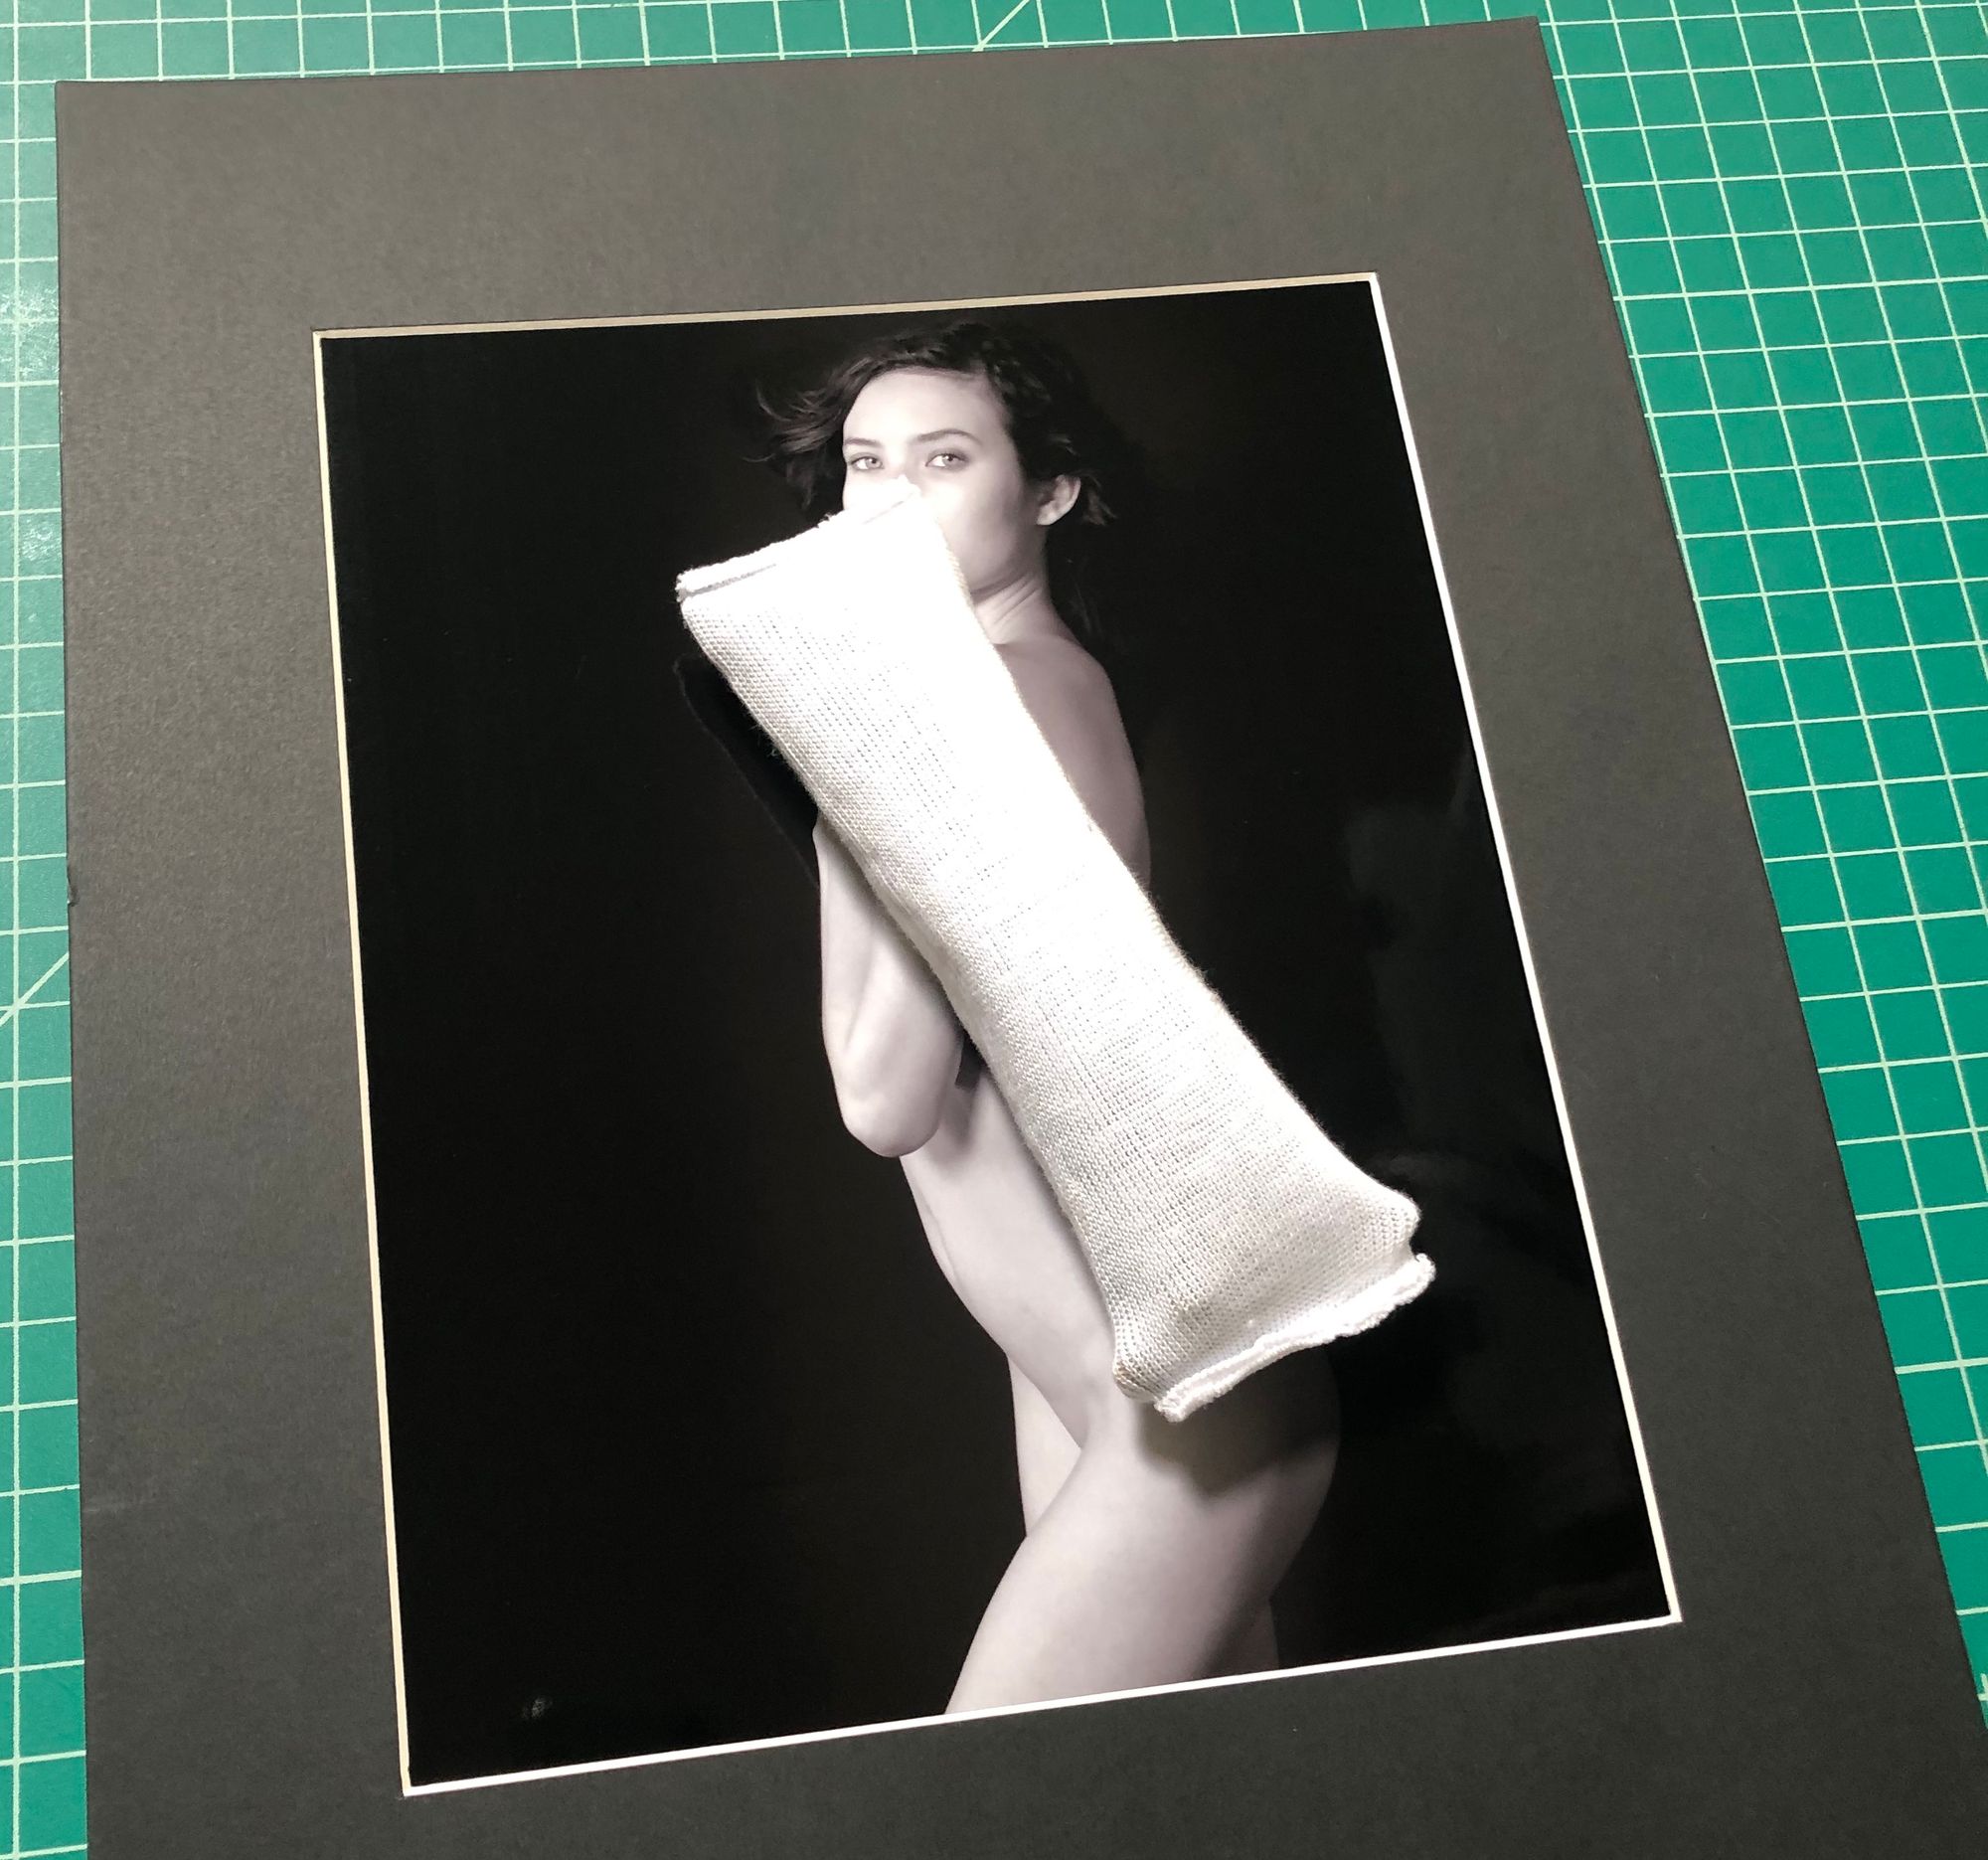
Mounting a photograph is, at its core, a very simple operation. You start with two pieces of equal size mat board that are larger than the photograph you’re planning to mount. In one of them (the front mat or window mat) you cut a hole that’s the same size as your print (or sometimes a tiny bit smaller or larger, depending on the effect you want). Your photograph gets sandwiched between that front mat and the other piece of mat board (called the backer board or back mat) so that your photo is visible through the window you cut in the front mat. Once the front mat and backer board are attached to each other, your image is ready for framing or display.
Mounting a photograph serves a couple of functions. It protects your print, and provides blank space around it, which reduces visual noise and distraction for viewers. It also helps keep your photograph away from the glass when put in a frame. If your photograph touches the frame’s glass, over time it can get stuck and become damaged. The mat board provides enough space between glass and your photograph to prevent that.
The boards also provides some stiffness, so the image can be temporarily displayed even without a frame by leaning it against something, putting it in a display stand, or hanging it with wire.
Mat Board
Mat board is a rigid board traditionally made from one or more layers of very thick paper. Mat boards can be bought in 2-ply, 4-ply, and 8-ply¹ variants, with the number of “plys” representing the thickness of the board. The most common type of mat board is 4-ply. 2-ply mat board is sometimes used for economy mounting of images and 8-ply is sometimes used to give additional stability and a more luxurious feel, though not all mat cutters or frames can accommodate the thickness of 8-ply boards.
Mat Board Materials
There are two materials typically used in the production of mat boards: wood pulp and cotton fiber (sometimes also called cotton rag or just rag). What wood pulp and cotton have in common is that they contain a high percentage of cellulose, which is a natural polymer, and the thing that gives paper its structure. In fact, any organic material with a high cellulose content can be used to make paper and you can find boutique and eco-friendly manufacturers making boards from other materials such as bamboo, linen, and hemp. When talking about commercially available mat boards, though, they’re almost always made of wood pulp or cotton.
Cotton
Cotton is the more expensive of the two materials by a considerable margin. Being over 90% cellulose, it results in a board that is very durable and has a much nicer feel than boards made from wood pulp. It’s also naturally archival, rated at 300+ years, which is why it is used by museums for mounting or storing fragile, old, or valuable photos, lithographs, woodcuts, and paper documents.
If you’re selling prints above a certain price point, you should absolutely consider using a high quality cotton board. For many photographers, though, rag boards are a bit expensive for day-to-day use.
Wood Pulp
Boards made from wood pulp are considerably more economical than cotton. It’s important, however, to understand that wood is not, in its natural state, an archival product. Wood pulp usually runs between about 40% and 50% cellulose. In addition to the cellulose, it contains a number of other substances, including a different organic polymer called lignin. Lignin is essentially harmless… at first. Over time, unlike cellulose, lignin will start to break down. As it breaks down, it creates acid.
If you’ve ever seen an old newspaper that has yellowed, become brittle, and faded, you’ve seen the effects of the acid generated when lignin breaks down.
You do not want this acid anywhere near your photographs.
You should avoid using mat boards made from raw wood pulp. Unfortunately, manufacturers don’t always identify exactly how they make their boards, so you mostly have to identify them by the fact that they don’t mention any archival properties. If a board isn’t advertised as acid-free, lignin-free, pH neutral, or archival, you should assume the board is made of raw wood pulp and not use it for anything other than practice.
There are two processes that paper mills use to make boards from wood pulp that mitigate the problems caused by the naturally occurring lignin.
- Buffering the wood pulp, which offsets the produced acids, rendering them harmless
- Removing the lignin from the wood pulp so the acid is never generated at all
Buffered Wood Pulp
Buffering is the less expensive of these two options. It involves simply adding a chemical to the wood pulp designed to counteract the production of acids. These boards are usually advertised as pH-neutral and they are much better choice than raw wood pulp. They are not, however, considered to be archival.
While the buffering will prevent the acid from causing damage for a while, the buffering will eventually run out or lose effectiveness. How long it will take for the buffering to stop working will depend on the conditions: primarily the amount of heat, humidity, and exposure to direct sunlight there is. In challenging conditions, the buffering can lose its effectiveness in just a few years, so I generally wouldn’t recommend these for prints you’re going to sell, or for anything with high intrinsic or sentimental value.
Alpha Cellulose
The more expensive process involves actually removing the lignin from the pulp entirely so that the harmful acids are never produced. This is usually accomplished by separating out just the cellulose from the rest of the pulp and using that to make the paper. Boards of this type are typically advertised using one or more of the following terms: acid-free, lignin-free, archival, or 100% alpha cellulose².
While these boards are not as durable or sturdy as rag boards, they are considered archival, generally rated at 100-150 years or more, though that can vary by manufacturer. I consider alpha cellulose boards to be the default option for photographers selling prints for less than maybe $500.
The challenging thing when shopping for boards is that they do not have to be made from just one of the four options (unbuffered wood pulp, buffered wood pulp, alpha cellulose, or cotton). Many manufacturers will combine materials to create additional options. For example, some board manufacturers create boards with cotton outer layers, and alpha cellulose core layers. These boards are still archival, and still have the luxurious feel of a cotton board, but they can be produced less expensively than a 100% cotton board.
Similarly, you can also find inexpensive archival mat board sold as “backer board” that uses a less expensive, unbleached natural paper for its inner layers. As the name suggests, you should only use these boards for back mats, never for the front mat. While the outer layers may be acid- and lignin-free, the inner cores are definitely not acid-free, so cutting a backer board will expose your print to free acids. These boards also run the risk of exposing your print to acid if the mat gets torn, bent, or otherwise damaged.
Mat Board Terminology
There are some industry standard terms that you’ll encounter when shopping for mat boards. These terms aren’t regulated, so you can’t necessarily rely on them, but they are helpful to understand when shopping for boards.
- Decorative Mats: This term is usually used to sell boards that don’t have archival properties. These boards will usually be made from buffered wood pulp, though you can also find boards sold under this term that are made from raw wood pulp.
- Conservation Board: Used to identify boards that have archival properties, but are not 100% cotton. Typically, these are either 100% alpha cellulose, or a combination of alpha cellulose and cotton.
- Museum Board: Used to describe archival boards made from 100% cotton.
Mat Board Colors
When we talk about the color of a mat board, we’re actually talking about three different colors: the front color, the back color, and the core color. Very often, all three colors are the same, but they don’t have to be. White front with a creme back is a very common type of mat board, as is black front with white or cream back.
You might be wondering what that third color is about.
Remember that mat boards come in versions with different numbers of layers? Well, when 4-ply and 8-ply mat boards are made, the manufacturer can choose to use a different color paper for the inner (or core) layers, and they often do. For example, you can buy white mat board with a black core, or black mat board with a white core.
The core color only comes into play for the front mat. When you cut a window out of your front mat, you won’t typically cut with a straight blade. Instead, you’ll use a special cutter that makes a bevel cut by holding the blade at an angle. This angled cut allows the core color to show through at the edges of the window. When the core color is different from the front color, the core color shows up as a thin outline around your artwork. This creates an effect that many people like.
What mat colors you choose is completely up to you. When framing an image to hang in a specific place, it’s not uncommon to select a colored mat that accentuates the image or its surrounding environment (or both). When in doubt, though, go with white for front and core (back color rarely matters). A white mat gets out of the way and lets your artwork be the star of the show. White mat board with a white core are also usually preferred–and are sometimes required–for showing in galleries or art shows or when submitting prints to a contest.
Foam Core Backer Boards
Sometimes, instead of using mat board for the backer board, some photographers will use foam core board instead of mat board. Foam core has two advantages over mat board. First, it’s much stiffer than even 8-ply mat board, so your final mounted photo will be a lot more sturdy. Second, foam core is inexpensive and readily available at any craft store. The main disadvantage of this kind of board is that the vast, vast majority of foam board—especially foam board purchased from craft stores or department stores—is not acid free and, therefore, not archival.
Foam core backer boards are generally best-suited to the temporary display of un-framed images—such as making a traveling exhibit or temporary display—since foam board is too thick for most frames.
Personally, I’m not a fan of foam core mounting outside of very limited situations, but it may be a good choice for some of your projects as long as you’re aware of its limitations.
Gathering Your Supplies
Before you get started, you’ll need to gather all the supplies and equipment you’ll need. Exactly what you need will depend on a couple of questions:
- Do you plan to cut your own mats or buy pre-cut mats?
- Do you want to create a flush mount or a hinge mount?
Pre-Cut vs. Cutting your Mats
If you’re printing your photographs only in standard sizes like 8×10, 11×14, 16×20, or 20×24 and are happy using black or white mats, you can buy pre-cut mats. You’ll pay a little bit more, but unless you mount a very large quantity of prints, the difference in price will be pretty minimal and you’ll save yourself the hassle of cutting the mat window and the expense of buying a mat cutter. You can even buy pre-made kits that contain pre-cut front mounts, backer boards, and crystal bags packaged together, which is an extremely convenient option if you’re looking to mount a lot of prints to sell.
If you print in non-standard sizes or aspect ratios, want to use non-standard mat colors, or want to experiment with fancy mounting techniques like double mats or french lines, then you’ll probably want to cut your own. Framing shops and some online suppliers will do custom mat cutting for you, but it tends to be considerably more expensive and it can take several days or longer to get your custom mats delivered.
Flush Mounting vs. Hinge Mounting
There are two main ways to assemble the front and back mat boards: flush mounting and hinge mounting.
With a flush mount, your front mat is attached to the backer board all the way around by some kind of adhesive. With care, a flush mount can be done in a way so the photograph itself is untouched by any kind of adhesive and can be removed from the mount without damage, but removing a print from a flush mount is almost certain to damage or destroy the mat boards.
With a hinge mount, the front mat and the backer board are connected along one edge using a piece of acid-free linen tape. The tape is used to create a hinge that connects the two boards while allowing the mount to be opened for easy removal of the photograph.
There’s no right or wrong choice here. Most galleries will accept either hinge or flush mounted images, and if you frame your image, you’ll never be able to tell which type of mount was used once it’s framed.
Generally, if you think the eventual owner of the picture is likely to want to remove the picture from the mount (for example, to frame it using a different color mat), then a hinge mount is the way to go. If you intend to display the mounted photograph without a frame, a flush mount is the definite winner because hinge mounts are more likely to come apart and are less stable when displayed freestanding. In pretty much every other case, it’s simply a matter of personal choice.
List of Needed Supplies
No matter which style of mounting you plan to use, you will need to a few things before you start.
Mat Board
For each print to be mounted, you’ll need:
- Two Pieces of Mat Board: They should be the same size as each other and should be larger than the item that you’re mounting. If you’re mounting a standard size print, the general rule of thumb is use mat boards of the next standard size up. So, to mount an 8×10, you’ll want to get two pieces of 11×14 mat board. Some photographers prefer to use mat boards that are two sizes up from the print they’re mounting, which gives more white space around the image. In that case, you’d get two 16×20 boards to mount an 8×10 print or two 20×24 mat board to mount an 11×14). You can also experiment with larger and smaller mat boards to find what you like.
A Way to Affix your Photograph to the Backer Board
There are several options you can choose for attaching your print to the backer board, including:
- Acid-Free Mounting Corners (like these): This is the approach I strongly recommend for most mounting projects. These mounting corners can be used to attach your photograph to the backer board without any adhesive touching the photograph. All of the other techniques below use some kind of adhesive to stick your photo directly to the backer board, which means there’s some chance of damage or destruction if you ever try to remove your photo from the mount. Mounting corners are inexpensive, archival, require no special hardware, and do not damage your print in any way. If you’re careful, you can even remove a print from the corner mounts and later put it back in. The only downside to corner mounts is if you print your images without a border, the mounting corners may intrude slightly into the mat window unless you cut the window a bit smaller than the actual print. Mounting corners may also not be a great option when mounting extraordinarily large prints.
- Dry Mount Adhesive Tissue: This is the traditional way to attach a photograph to a backer board. This special tissue contains a heat activated adhesive that requires the use of a tacking iron or heat press. Typically, a tacking iron is used to lightly affix the print to the backer board, and a heat press is used to permanently attach it. Using adhesive tissue with a tacking iron is the next best option after mounting corners because the glue can be heated up and the print can usually be removed from the backer board with little to no damage. There might be some staining on the back of the print after it’s removed, but usually the front of the image will be completely unharmed if the removal is done carefully.
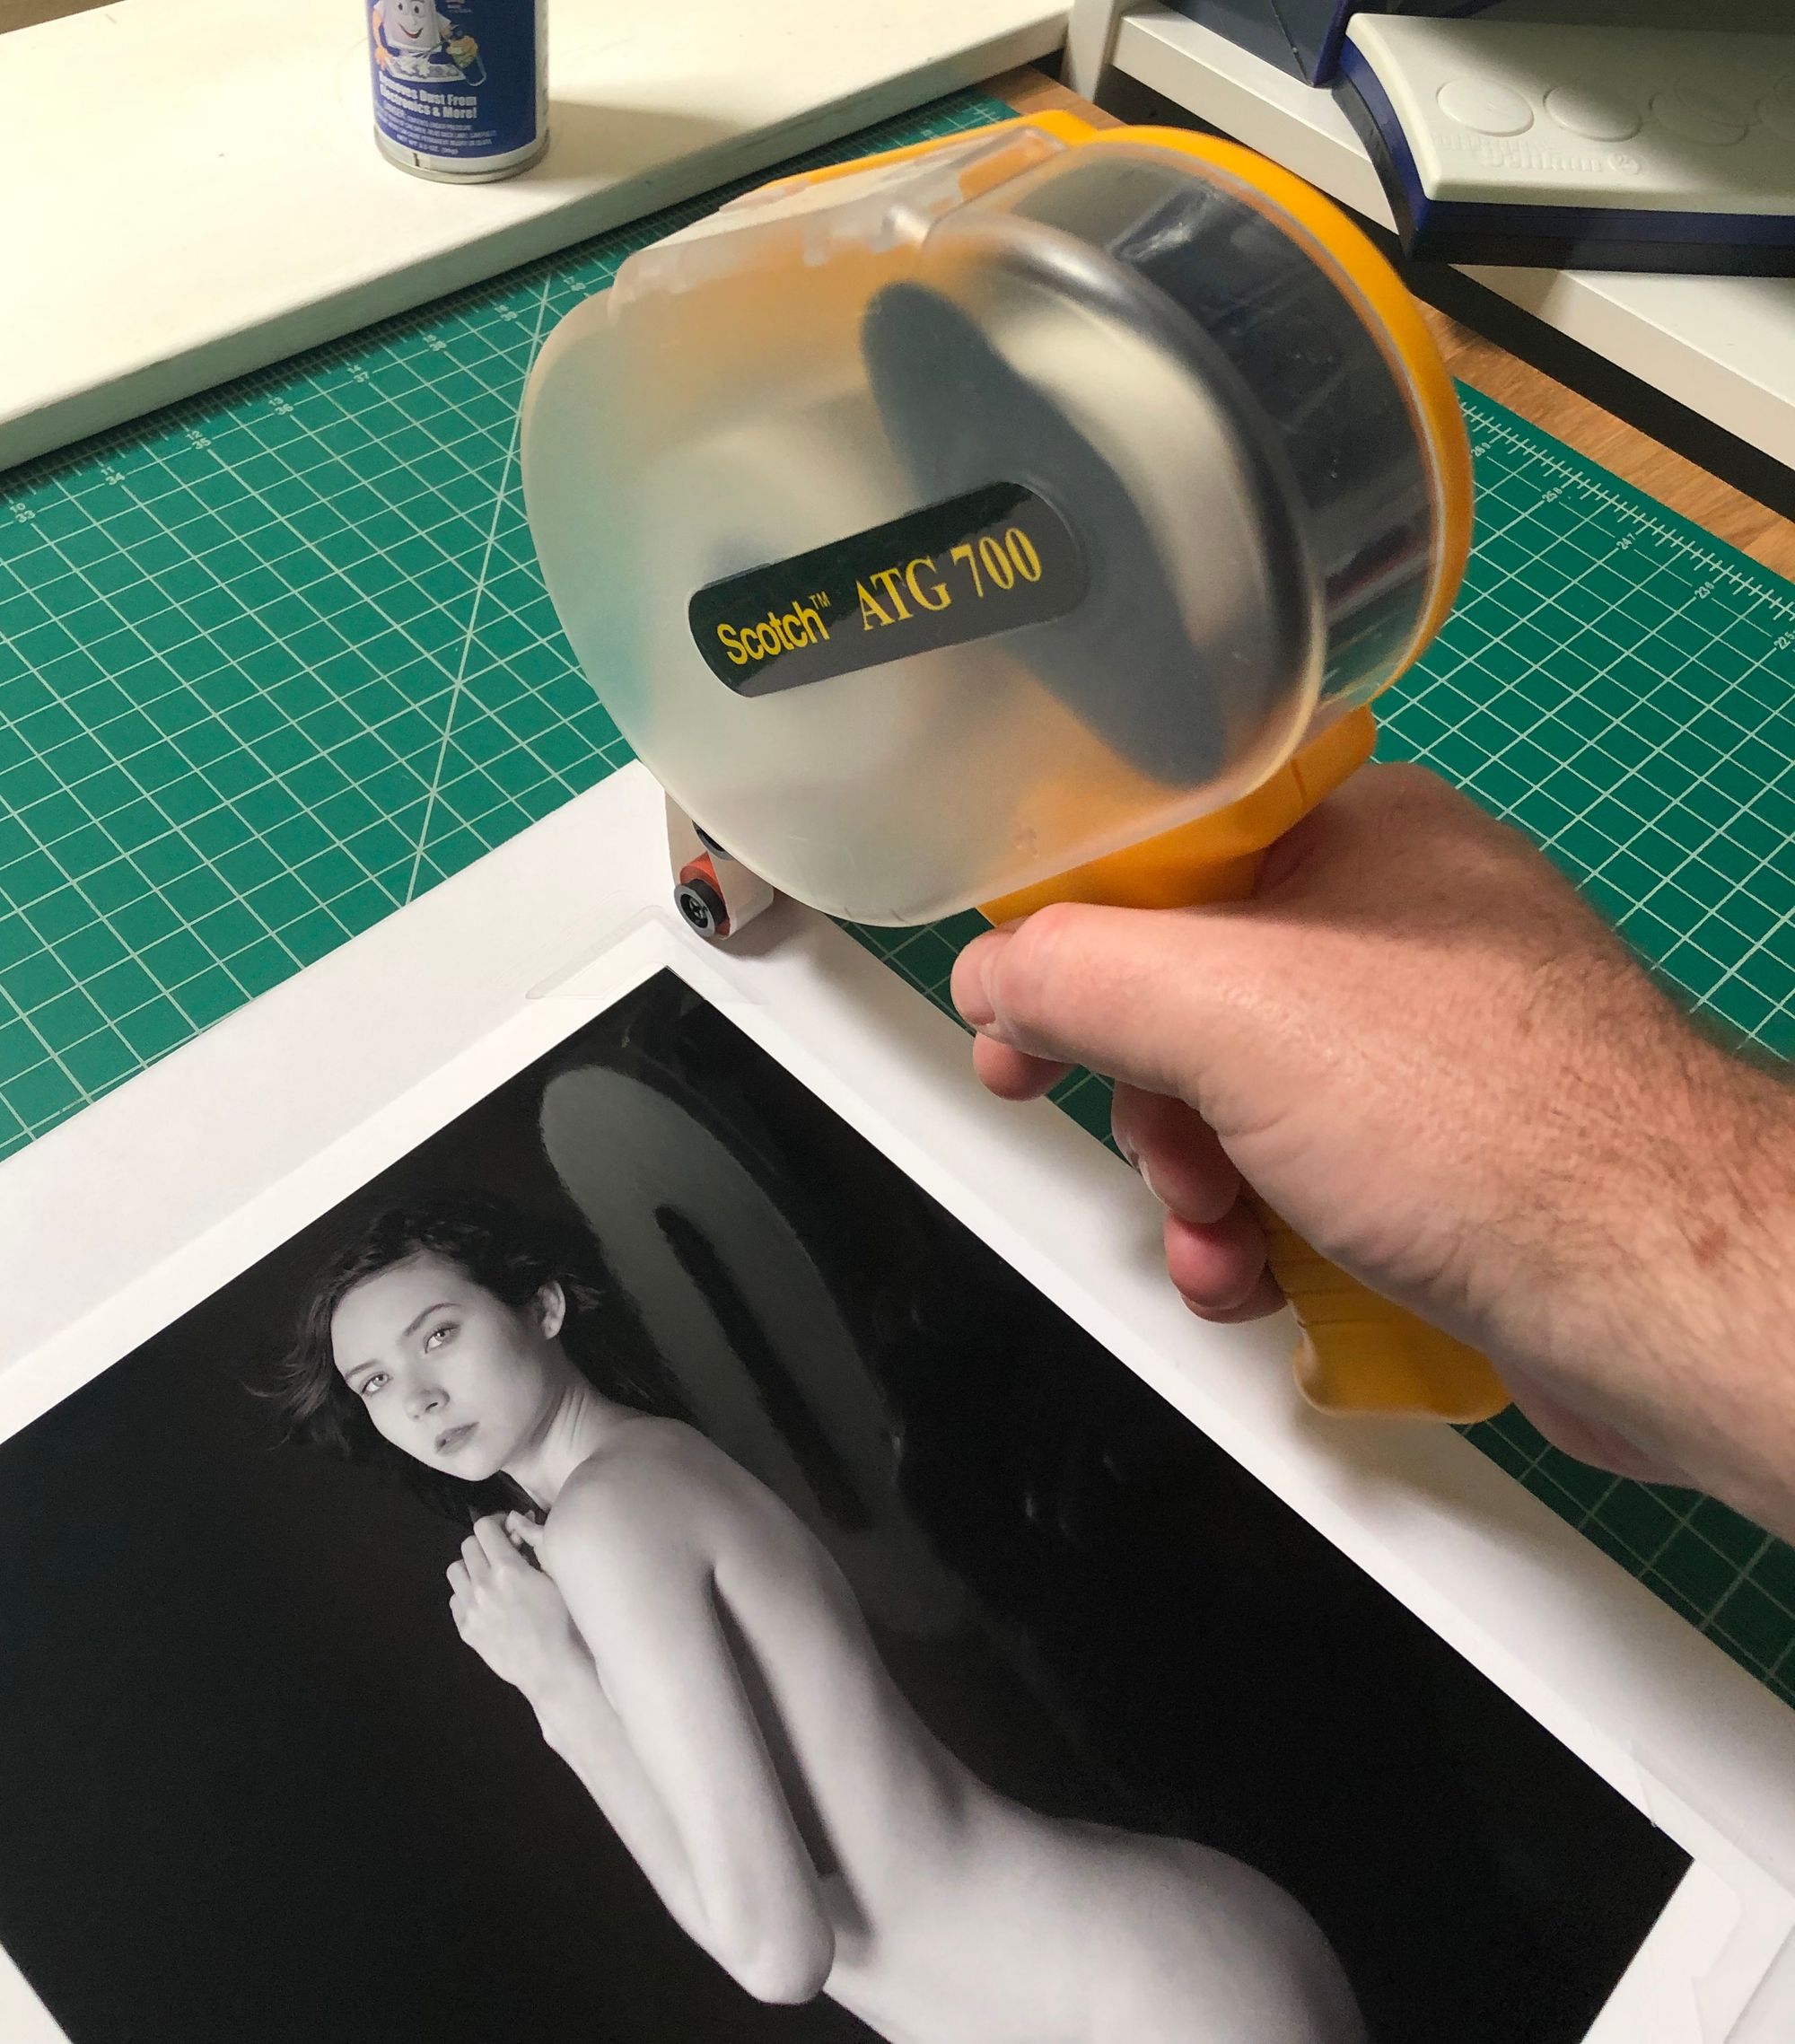
- Two-sided Transfer Tape: Used with a special applicator, transfer tape is a strong adhesive that can affix your print to the backer board quickly and easily. Transfer tape is generally intended to be a permanent bond, so removing a print mounted this way can be very difficult and damaging the print is a strong possibility during removal.
- Spray Mount: Spray mount is a spray adhesive specifically designed for mounting artwork. Removing photographs affixed with spray mount is not impossible, but it can be difficult, especially after a long period of time or if a lot of it was sprayed. The stuff also kind of just gets everywhere and makes everything in the general vicinity sticky, so it’s best to spray outside or under a vent hood. Even better, just choose another option.
A Way to Cut the Mat Window (optional)
If you’re going to cut your own mats, you’ll need a beveled mat cutter. You have two basic choices here.
- A Handheld Mat Cutter: These are many types of special cutters and knives that can be used to create bevel cuts (such as this one or, if you want something less expensive, you could try this one). To use a handheld mat cutter, you’ll also need a self-healing cutting mat (like this one) and a ruler or, preferably, a T-square that’s large enough for the size mat boards you’ll be cutting.
- A Full Size Mat Cutter: There are larger mat cutting devices like the Logan Simplex series, that make cutting mats faster than doing them by hand with a ruler and handheld cutter. These mat cutters are considerably more expensive than the handheld models, but they make it much easier to get consistently good results and they’re pretty much self contained – you won’t need a cutting mat or T-square to use them, and most will do both bevel and straight cuts. There are also heavier duty and even automated commercial options, but they’re not usually a good choice for hobbyists or even professionals working in relatively low volumes of prints because of how expensive they are.
NOTE: Most mat cutters are designed to handle 4-ply mat board and thinner. If you’re planning to use 8-ply mat board, make sure the mat cutter you buy is capable of cutting 8-ply boards. .
A Way to Affix the Front Mat to the Backer Board
How you connect the front and back mats depends on which type of mounting you’re doing. If you plan to flush mount your prints, you’ll need an adhesive to attach the front mat to the backer board. For this, I strongly recommend:
- Two-sided Transfer Tape: Transfer tape comes in several widths. Generally, ½ inch works well for most mounting jobs. ¼ inch is a good choice when working with 8×10 or smaller mats, and if you’re planning to mount very large prints, you might want to look at larger widths.
- Transfer Tape Applicator: Transfer tape isn’t a standard two-sided tape where you can just pull pieces off from a roll and stick them to something. It’s more of an industrial adhesive that comes on a roll, so using it requires a special applicator. You’ll need to get one if you want to use transfer tape, but IMO, it’s well worth the investment. I have two, one loaded with ¼” tape for smaller prints and one loaded with ½” tape for larger prints.
You could also choose to use one of the other types of adhesives mentioned earlier for mounting your print to the backer board, such as adhesive mounting tissue or spray mount, but the former requires additional equipment and the latter… well, it just gets everywhere. You can also use any glue or paste that’s acid-free, including glue sticks.
If you plan to hinge mount your photos, instead of two-sided transfer tape or adhesive, you’ll need to get:
- Acid-free Linen Tape (sometimes called hinging tape or book binding tape): This special, archival (one-sided) tape will be used to create the hinge between your front mat and backing board. You can not substitute other types of tape (even if archival) for this purpose.
Extras
That’s basically everything you need, but here are a few other items that can make your life easier:
- Gloves: It’s possible to mount a photo without ever touching the surface of the print, but it’s not easy, especially when mounting large, borderless prints. Wearing a pair of archival cotton gloves or unpowdered nitrile exam gloves at certain steps of the process can help avoid leaving inadvertent fingerprints or smudges.
- Weight Bags: These handy little cloth-wrapped beanbag weights are designed specifically for mounting and framing. You can safely put them on your photo once you’ve positioned it on the back mat. The weight will hold your photo in the correct location while you attach it to the backer board and it won’t leave marks on your print if you keep it clean.
- A Writing Utensil: Unless you have access to a very high-end automated mat cutter, you’re going to need to draw some guidelines on your mats to know where to cut the window and where to place the print. You also may want to sign your print or write edition marks on it (e.g. “1 of 25” to indicate that this is the first print made and that no more than 25 prints will ever be made). An old fashioned wooden pencil works best for marking your guidelines. I usually prefer a hard one—like a 2H—or a non-photo-blue pencil so the writing isn’t too dark, but nobody will ever see the guidelines once the mount is complete, so any pencil should be fine. For edition marks and signatures, a pencil is the traditional option because it makes it harder to counterfeit. I personally prefer using a pen, but if you go that route, make sure to use one that’s archival, such as the Sakura Pigma Micron pens so that you don’t risk damage to your mounted photographs.
Doing Your Window Calculations
The next step in mounting a photograph is to do some math to figure out where to cut the window in your front mat. Don’t worry, it’s not very hard math, but you do need to do some simple calculations to figure out where to cut.
The Simple Case – Centered Window
The easiest and most common way to mount photographs is to center the image in the mat. The math for this is relatively easy. You take the dimensions of the mat board you’re using and subtract the dimensions of the photograph you’re mounting and then divide the results by two. That will give you the size of the margins for cutting your front mat window.
For example, if we’re mounting an 11×14 photo using 16×20 mat boards and want the window the exact size of the print, we subtract 11 from 16 and divide by 2 to get the short side margin and subtract 14 from 20 and divide by 2 to get the long side margin, like so:
| Mat Board | Photograph | Delta | Margin | |
|---|---|---|---|---|
| Width | 16 | 11 | 5 | 2.5 |
| Height | 20 | 14 | 6 | 3 |
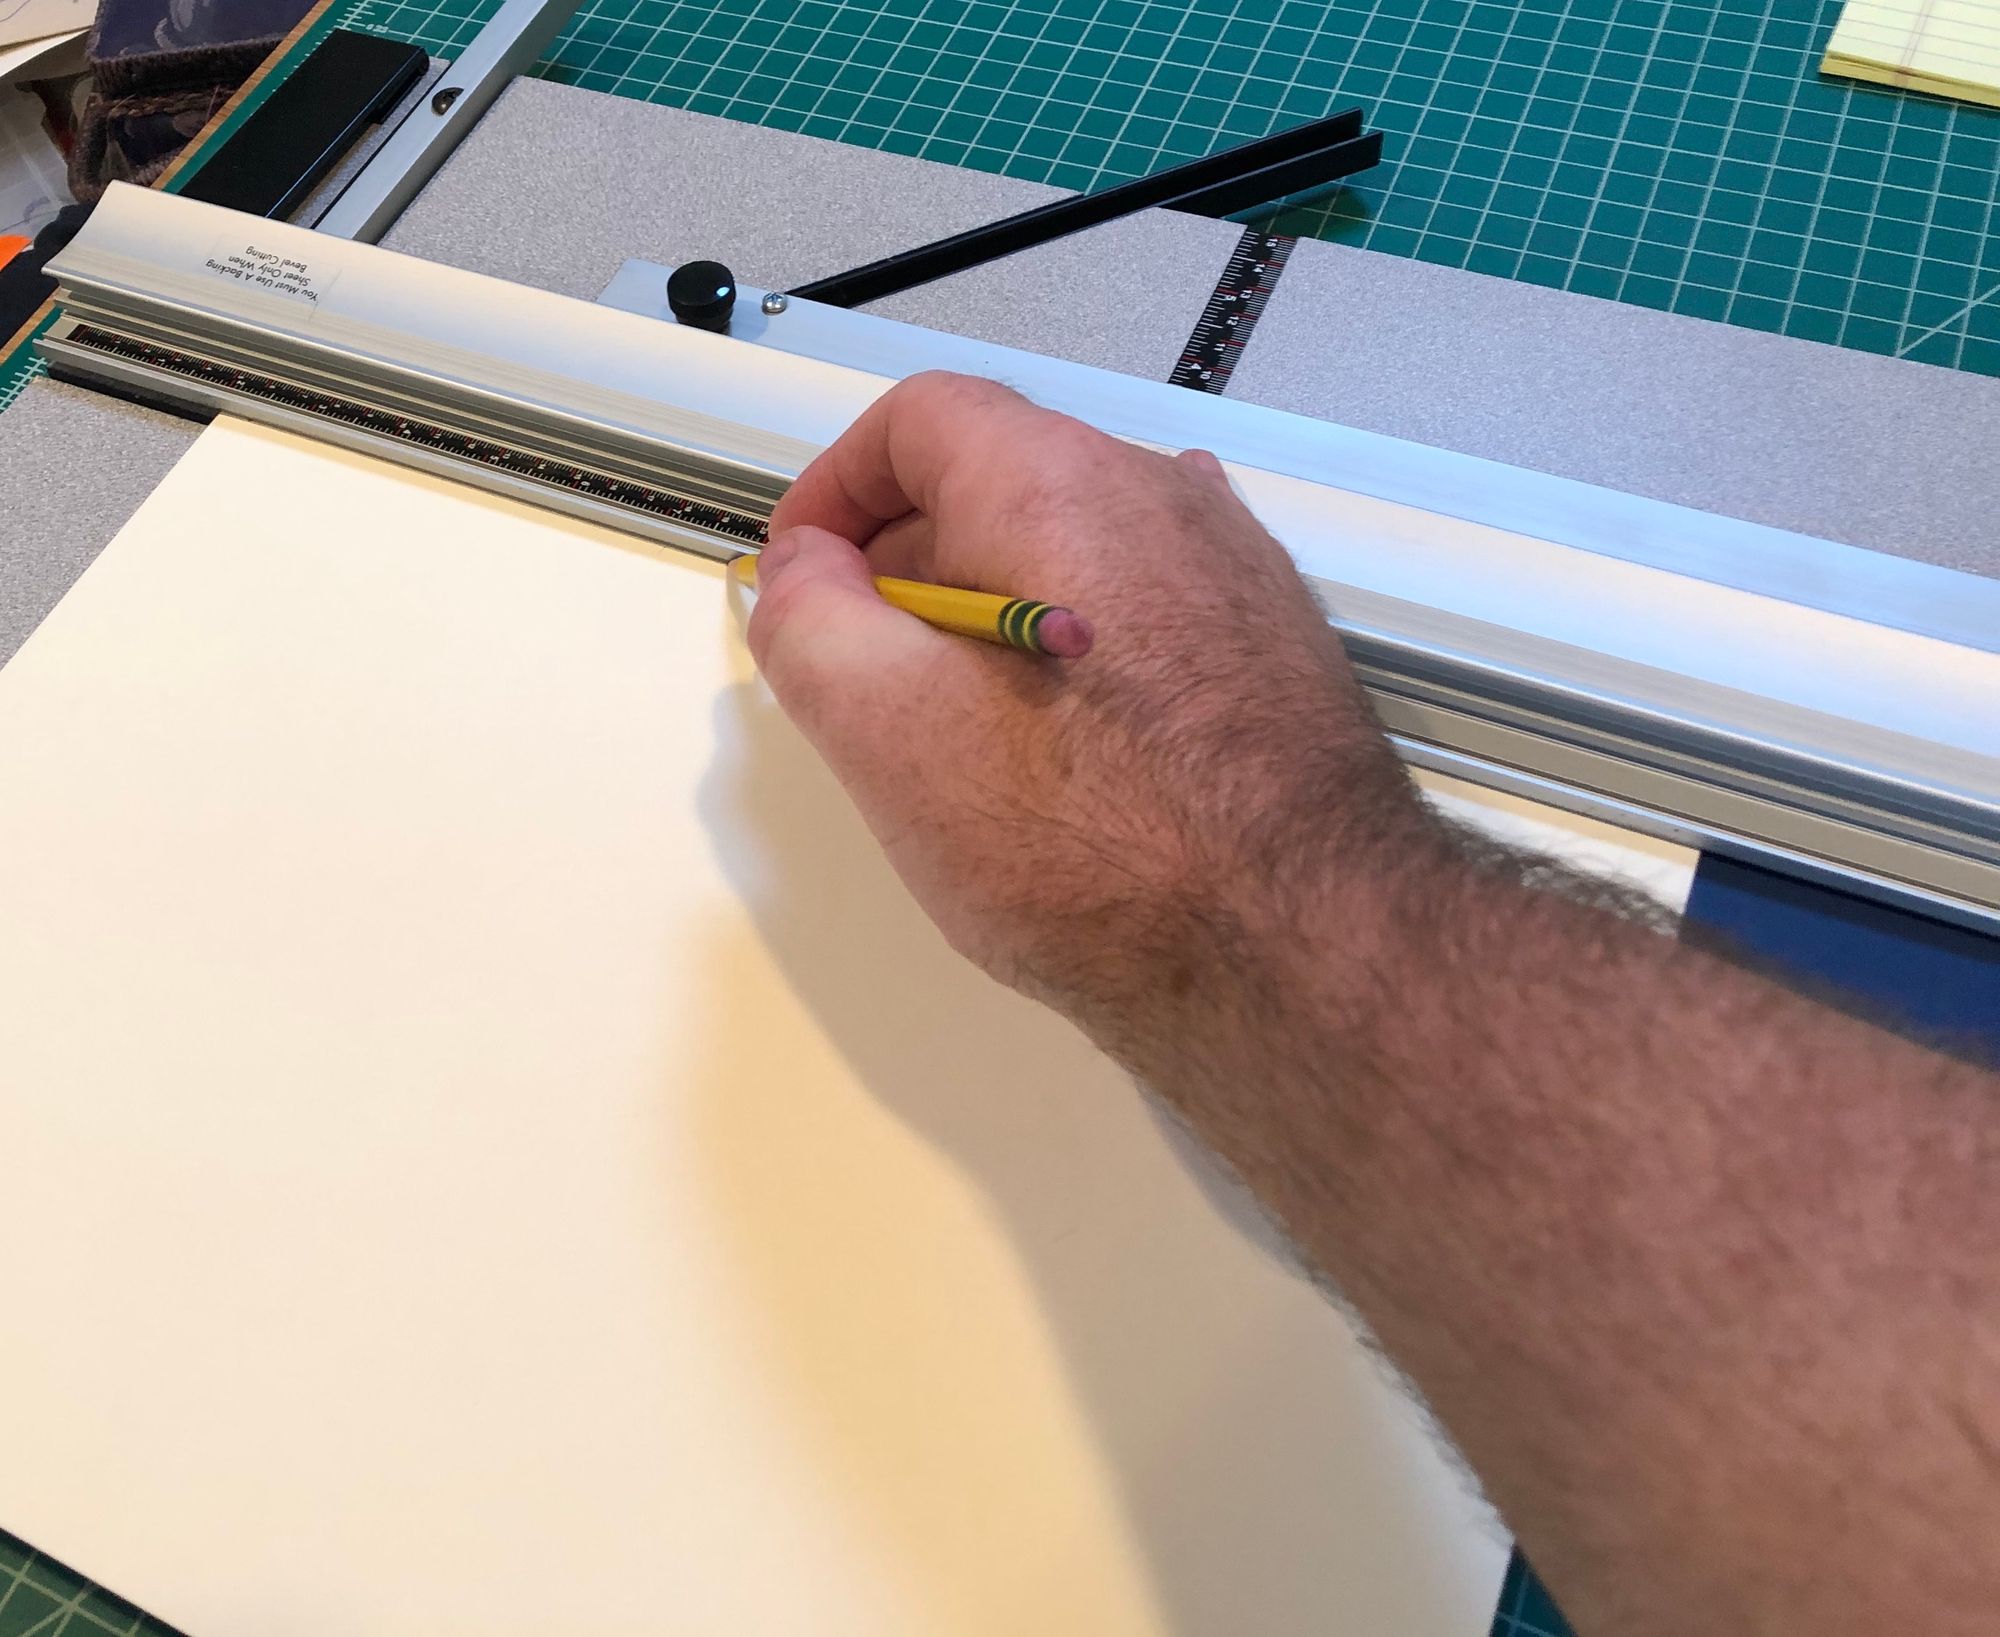
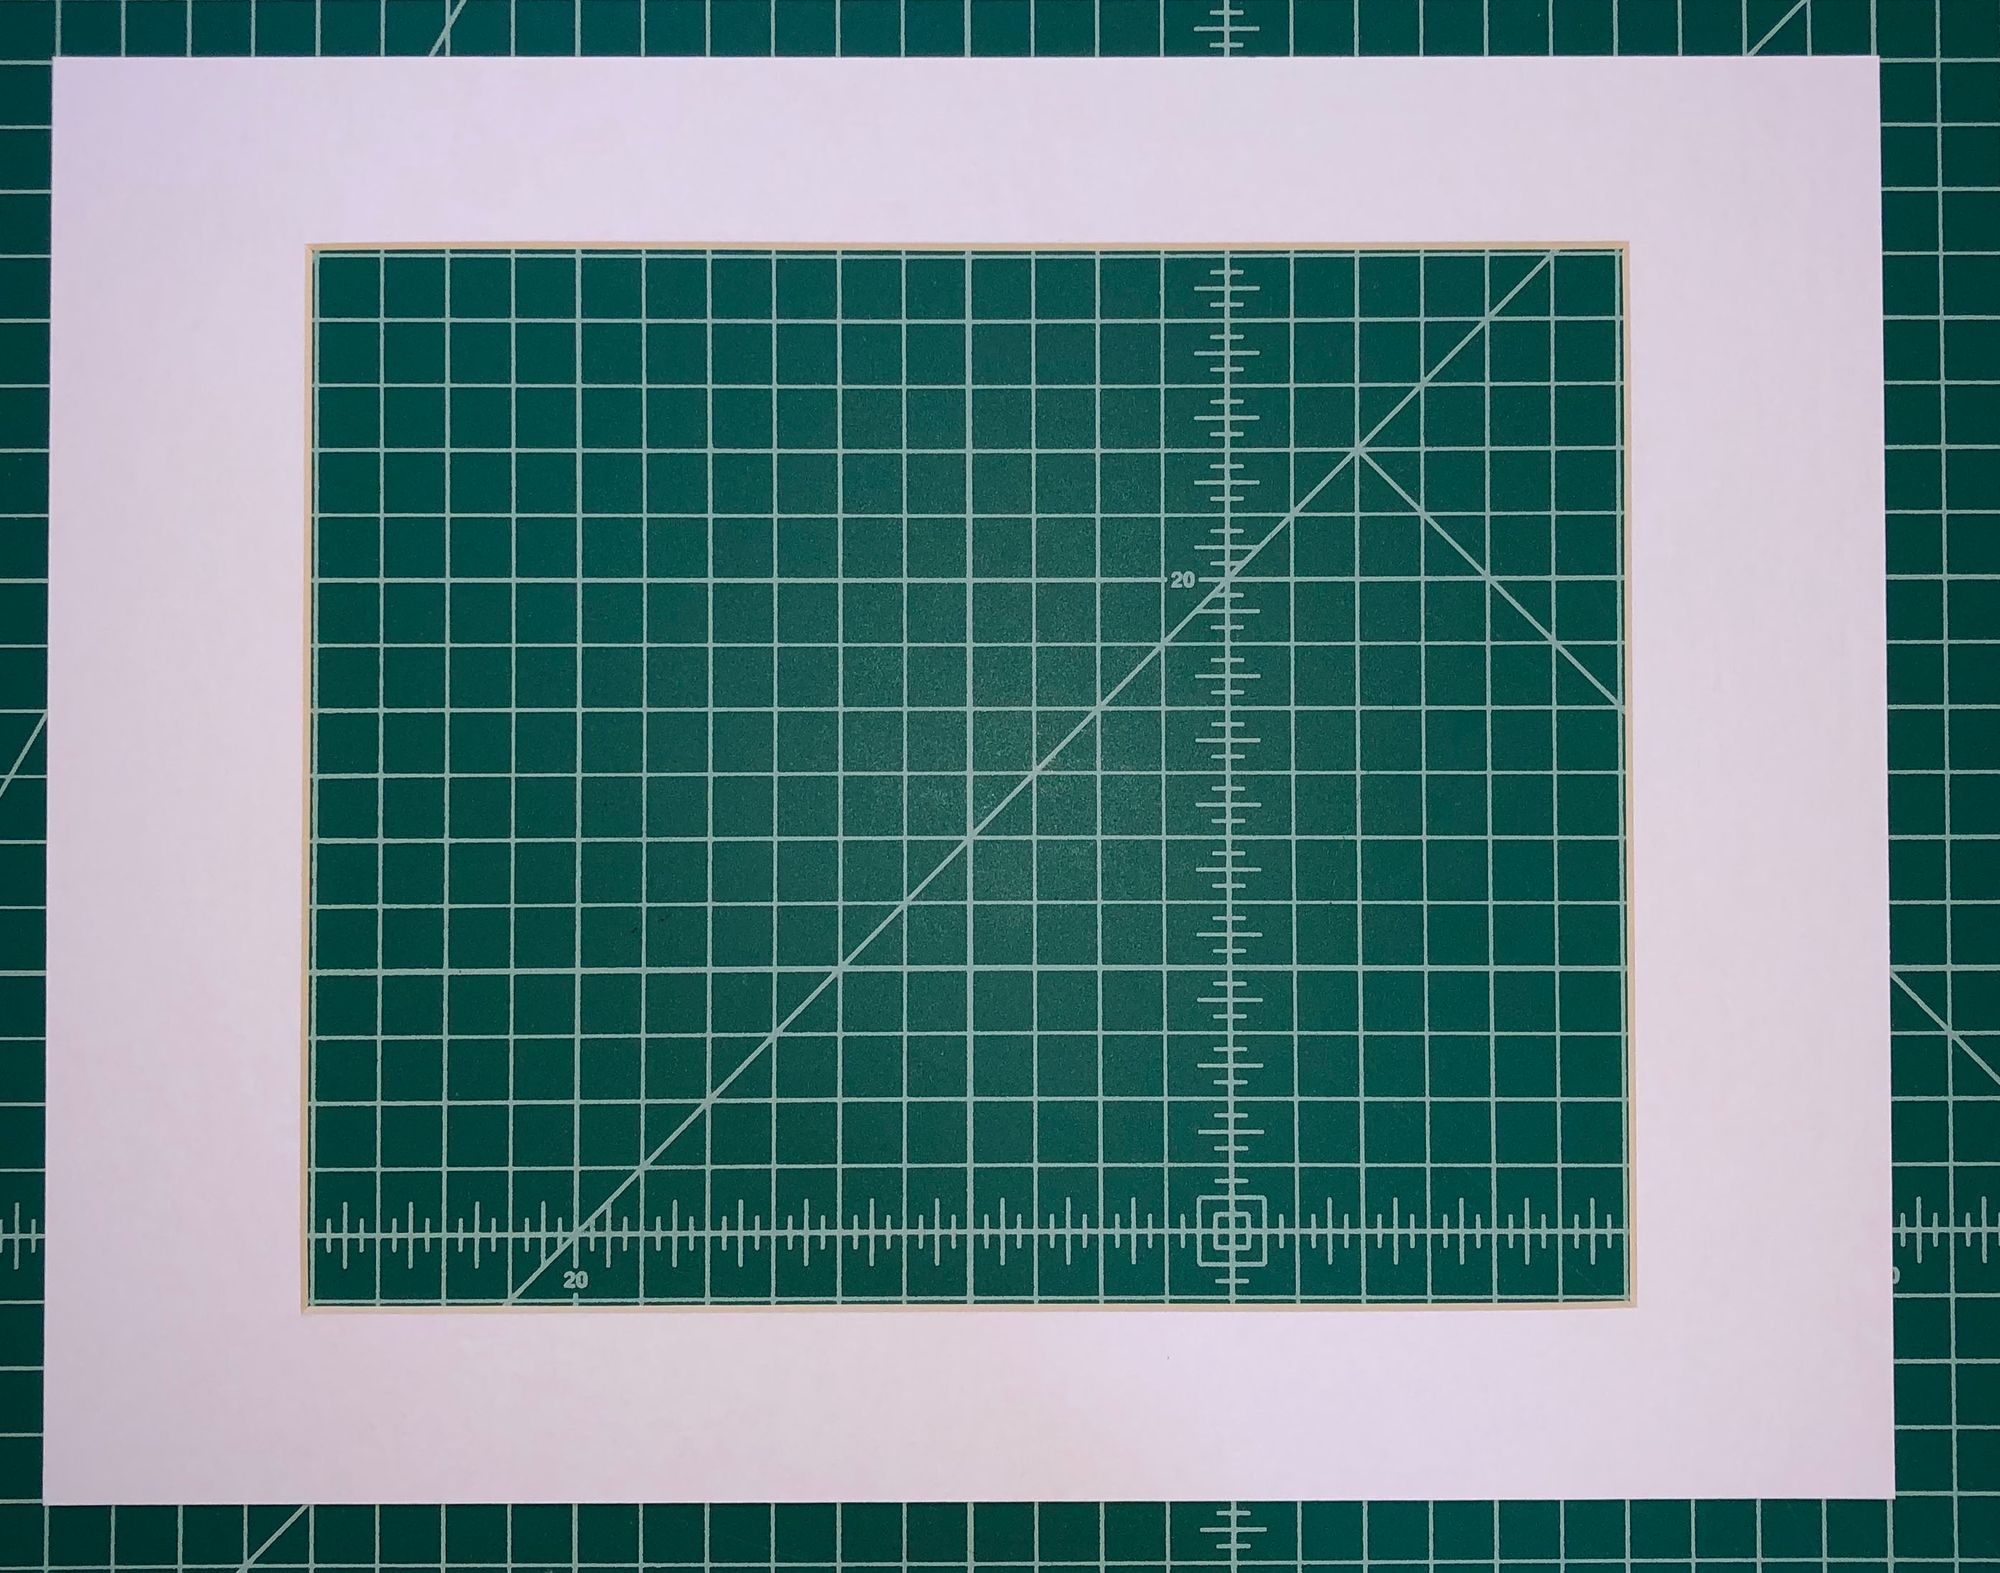
Now, on the back side of the front mat board, use a T-square (or your mat cutter) to mark straight lines based on the calculated margins. In that last example, draw one line that’s 2.5 inches in from each side in the shorter direction, and one line that’s 3 inches in from each side in the longer direction. When done, your guides will look something like this:
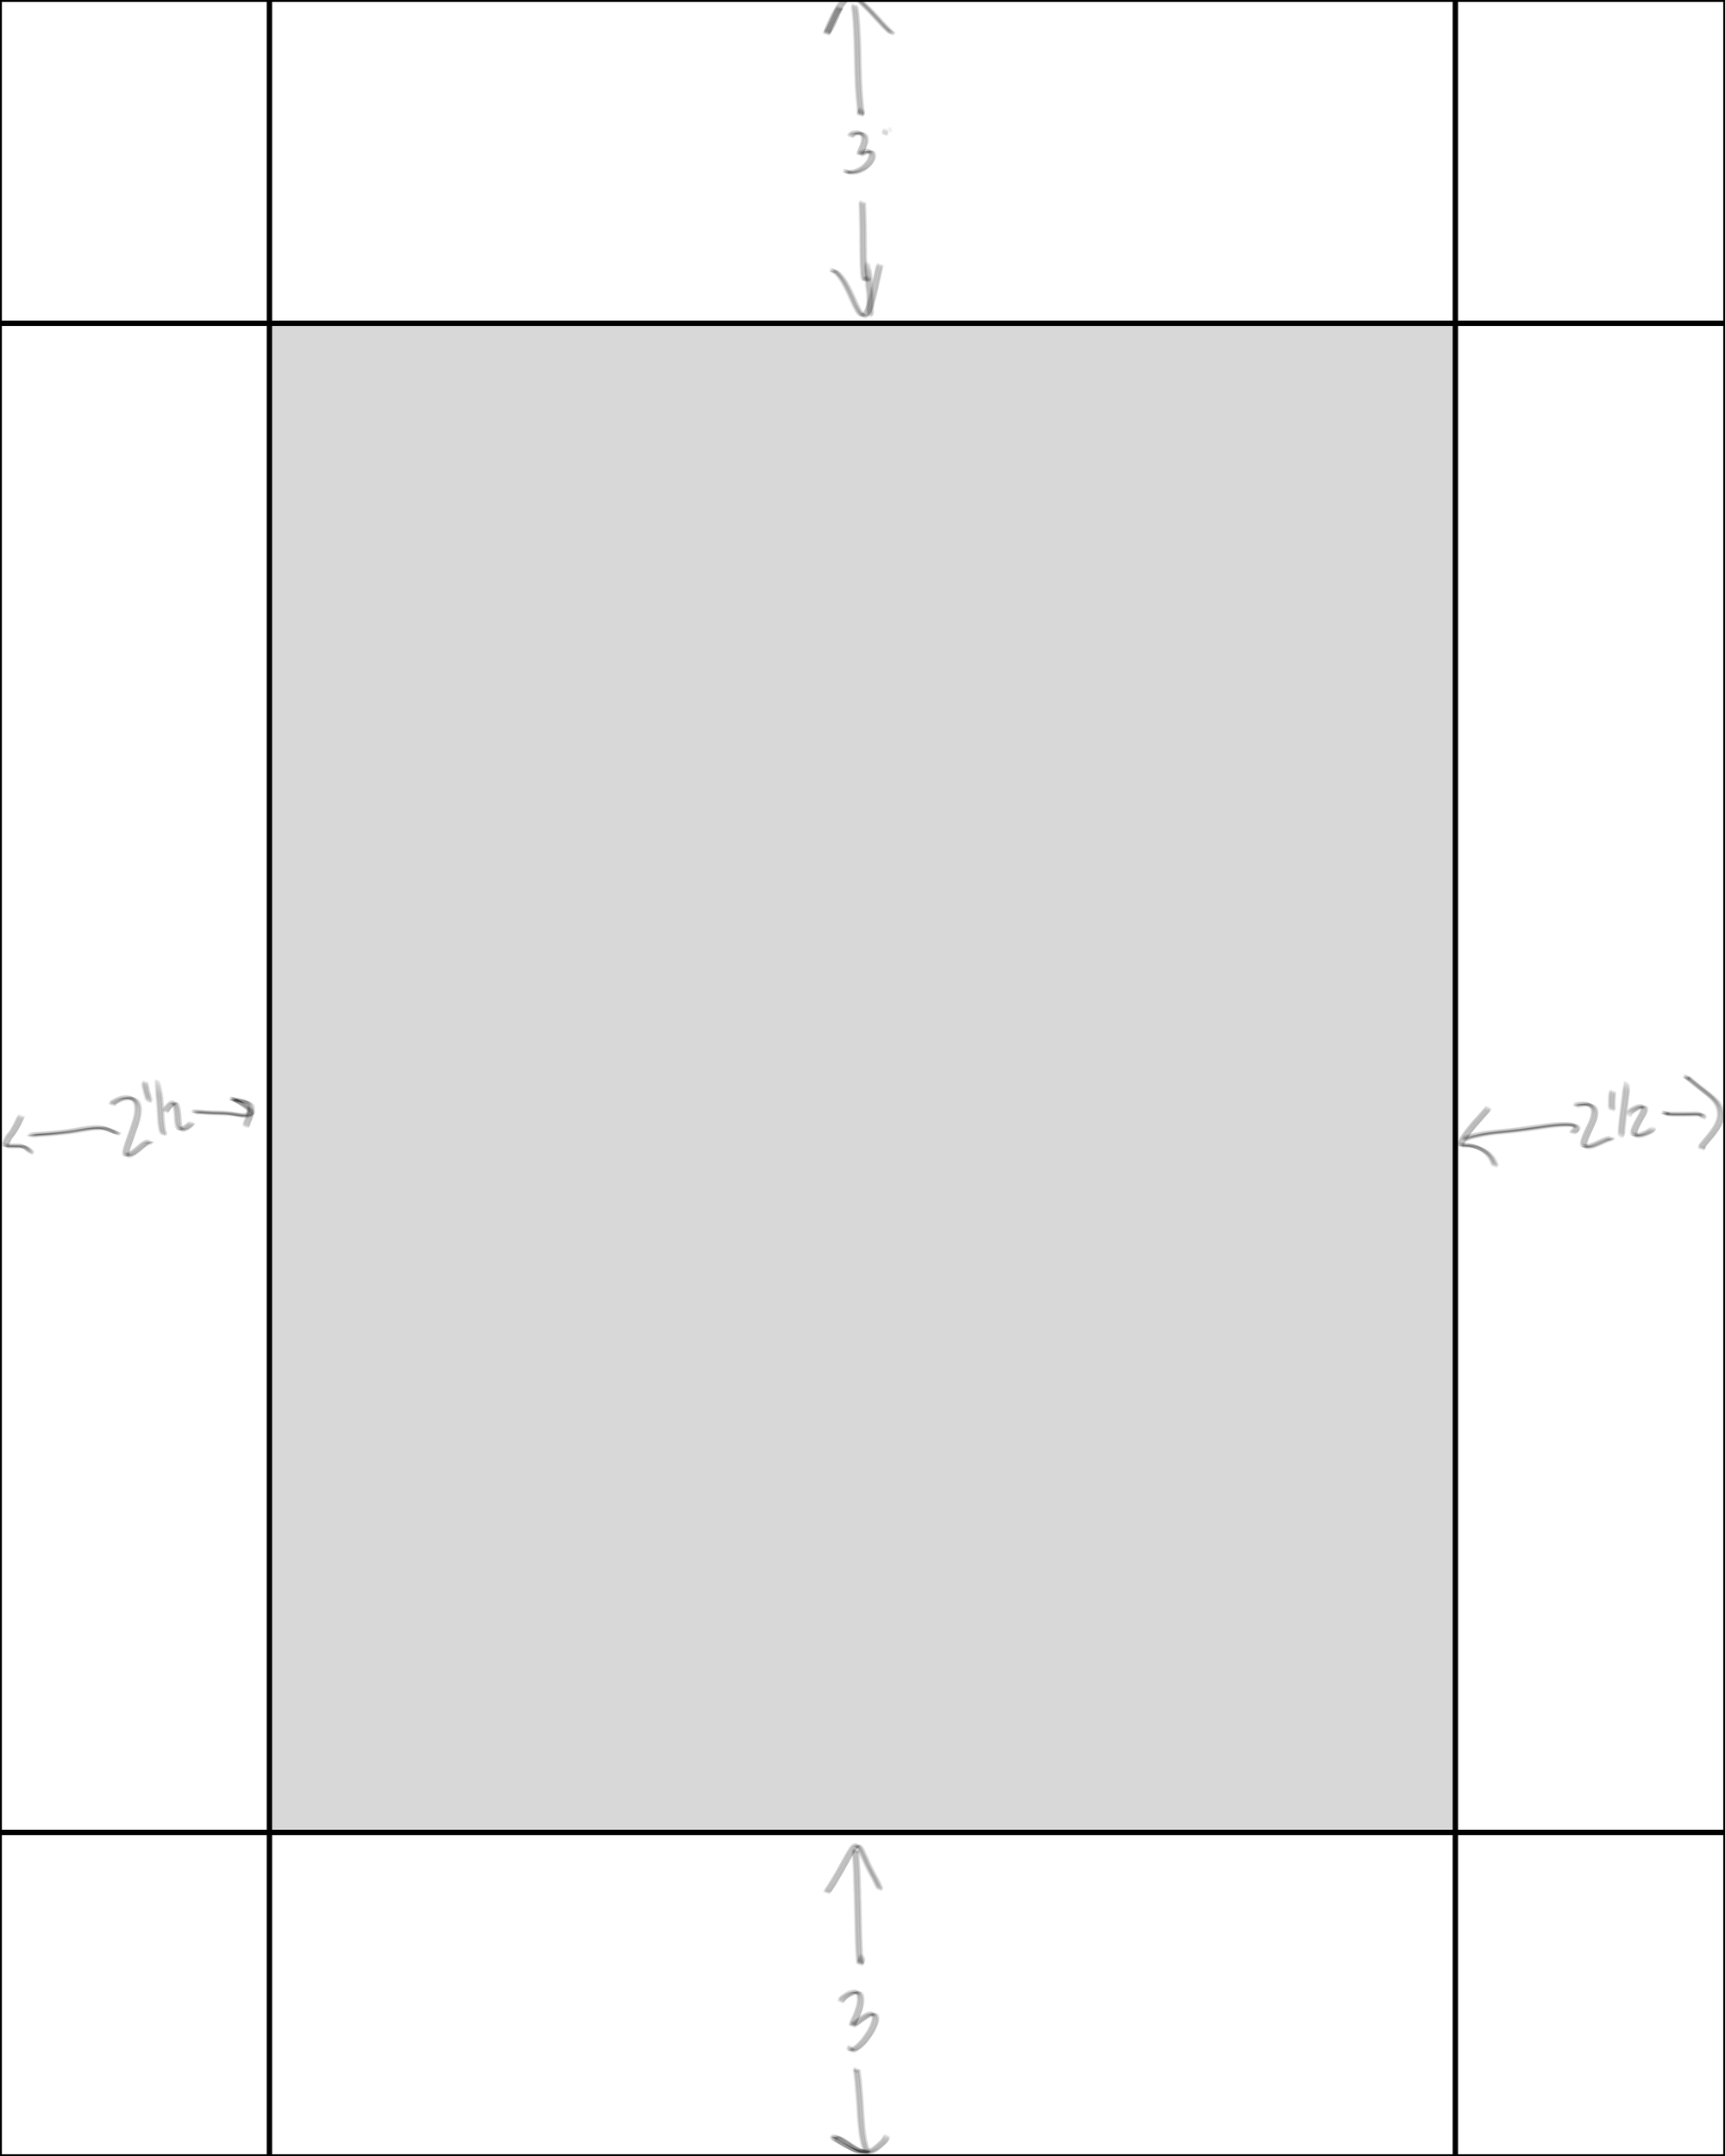
The part of the mat between the four lines that you’ve drawn is the window that you need to cut out (colored in gray above).
Once you have your guides, place the board with the front side down and your drawn guides facing up on a cutting mat or your mat cutter. Cut the window by making four straight cuts with your mat cutter, each from one corner of the window to another corner.
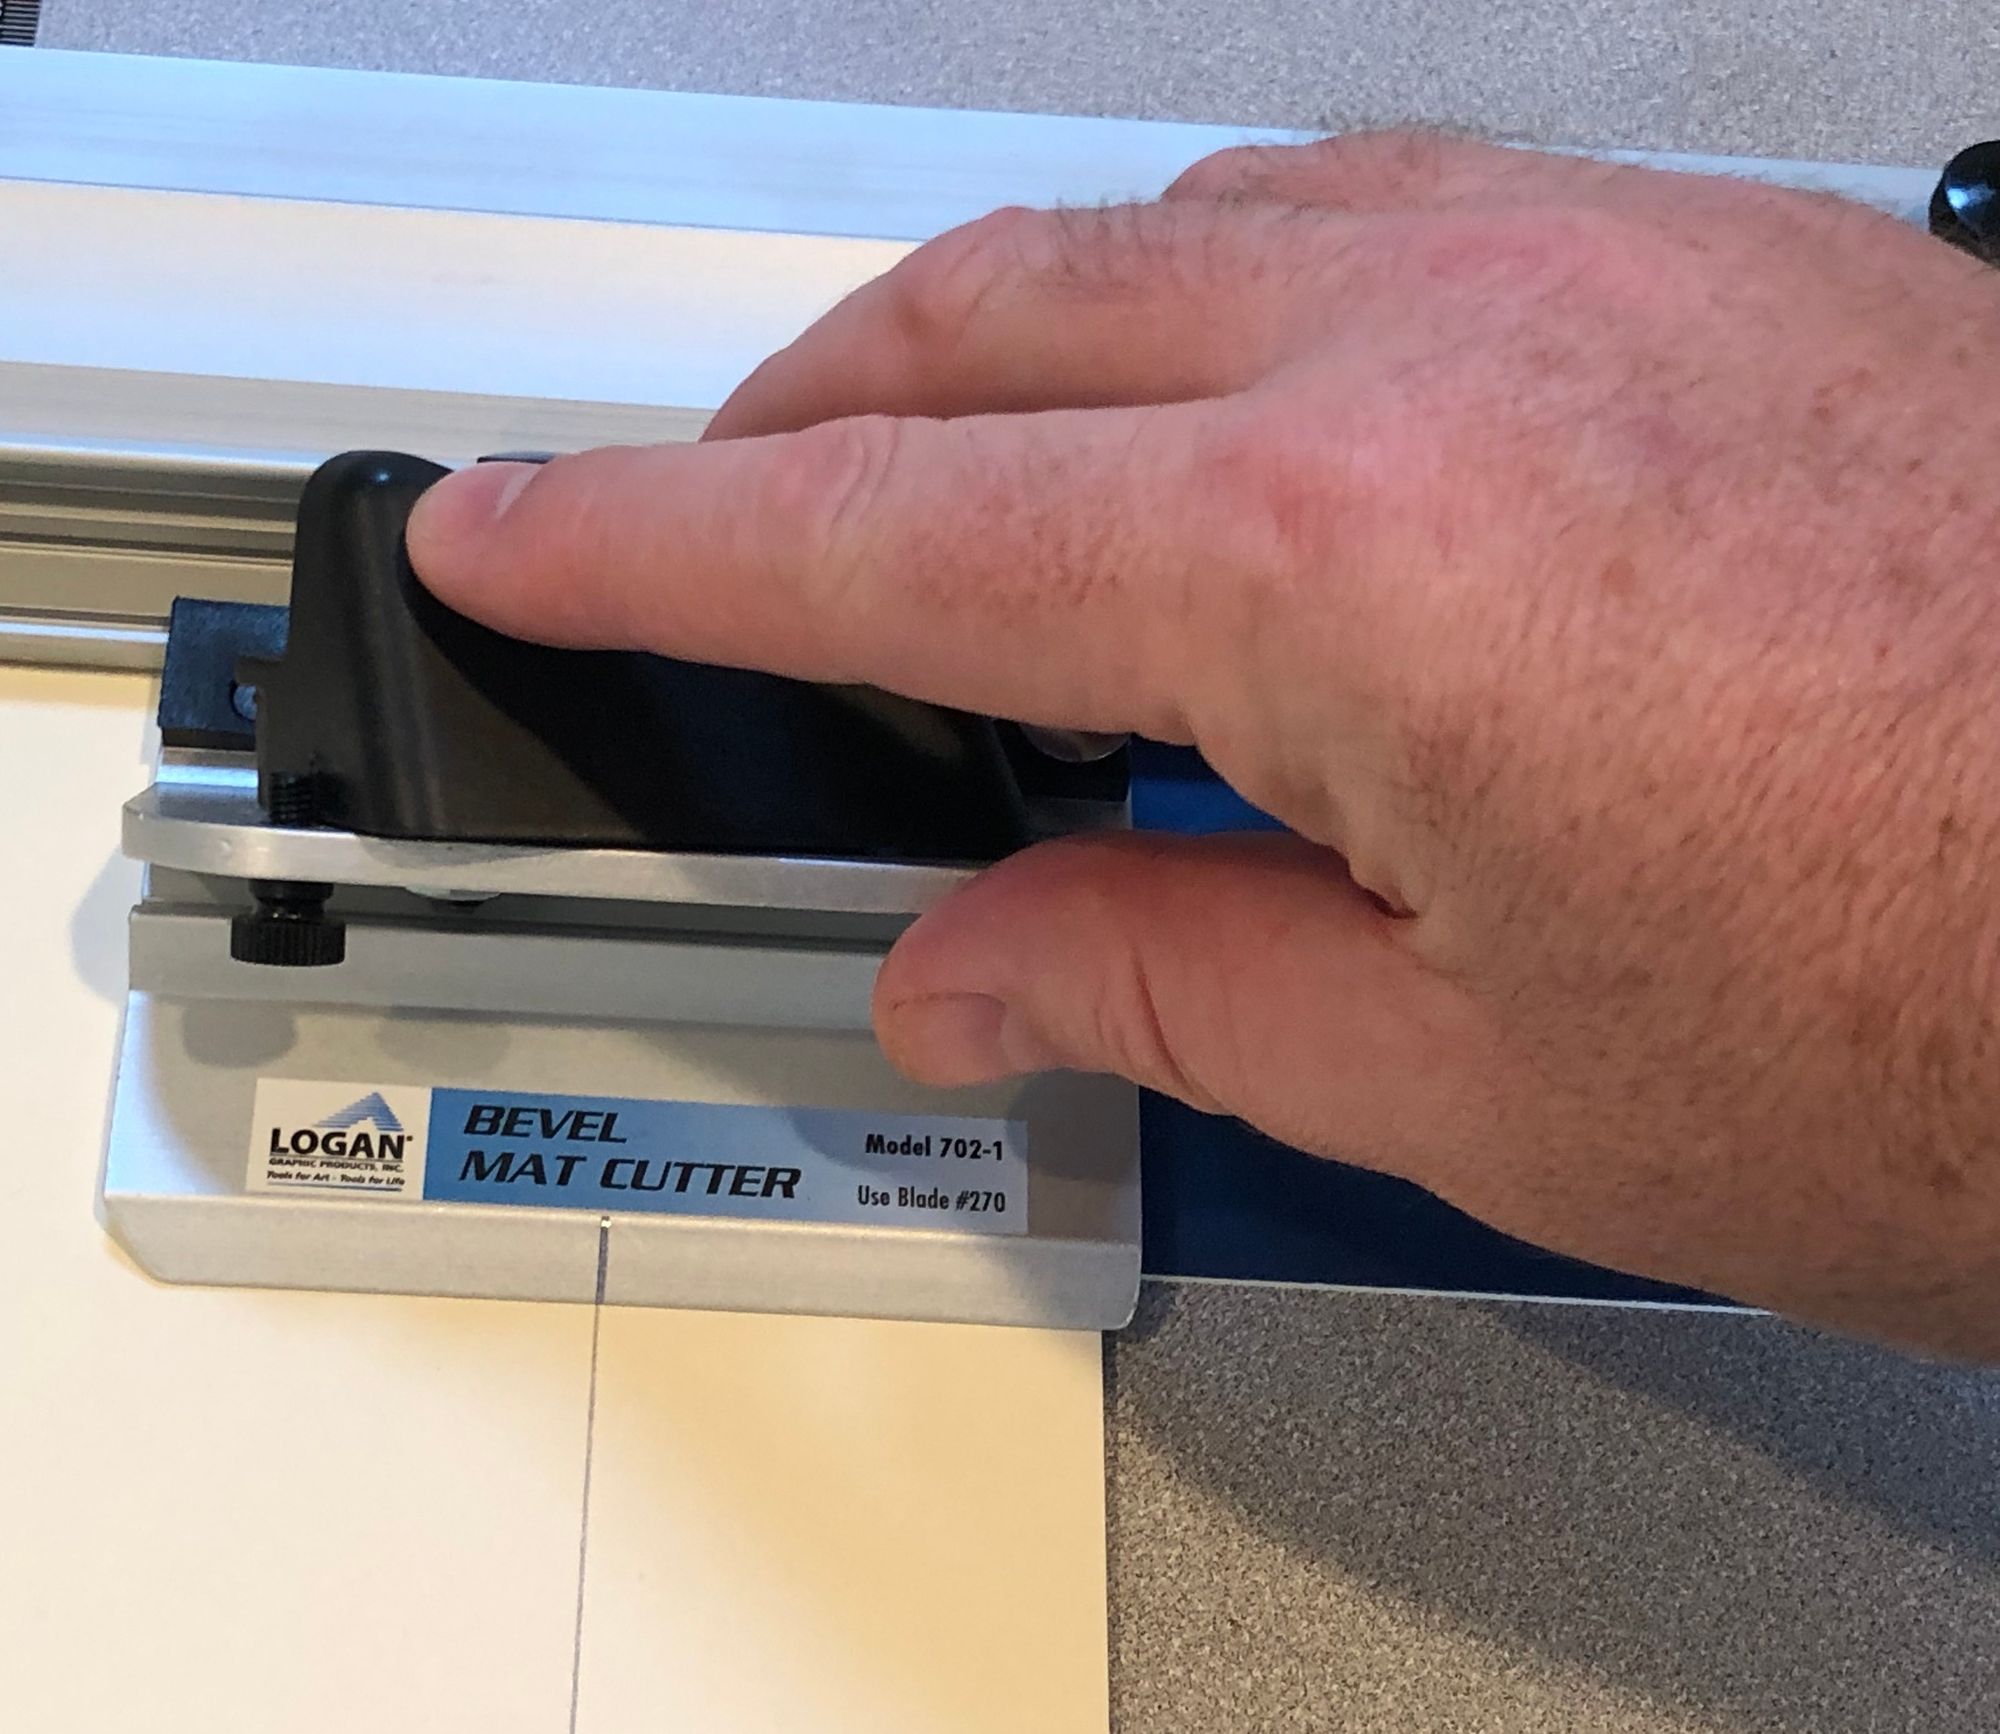
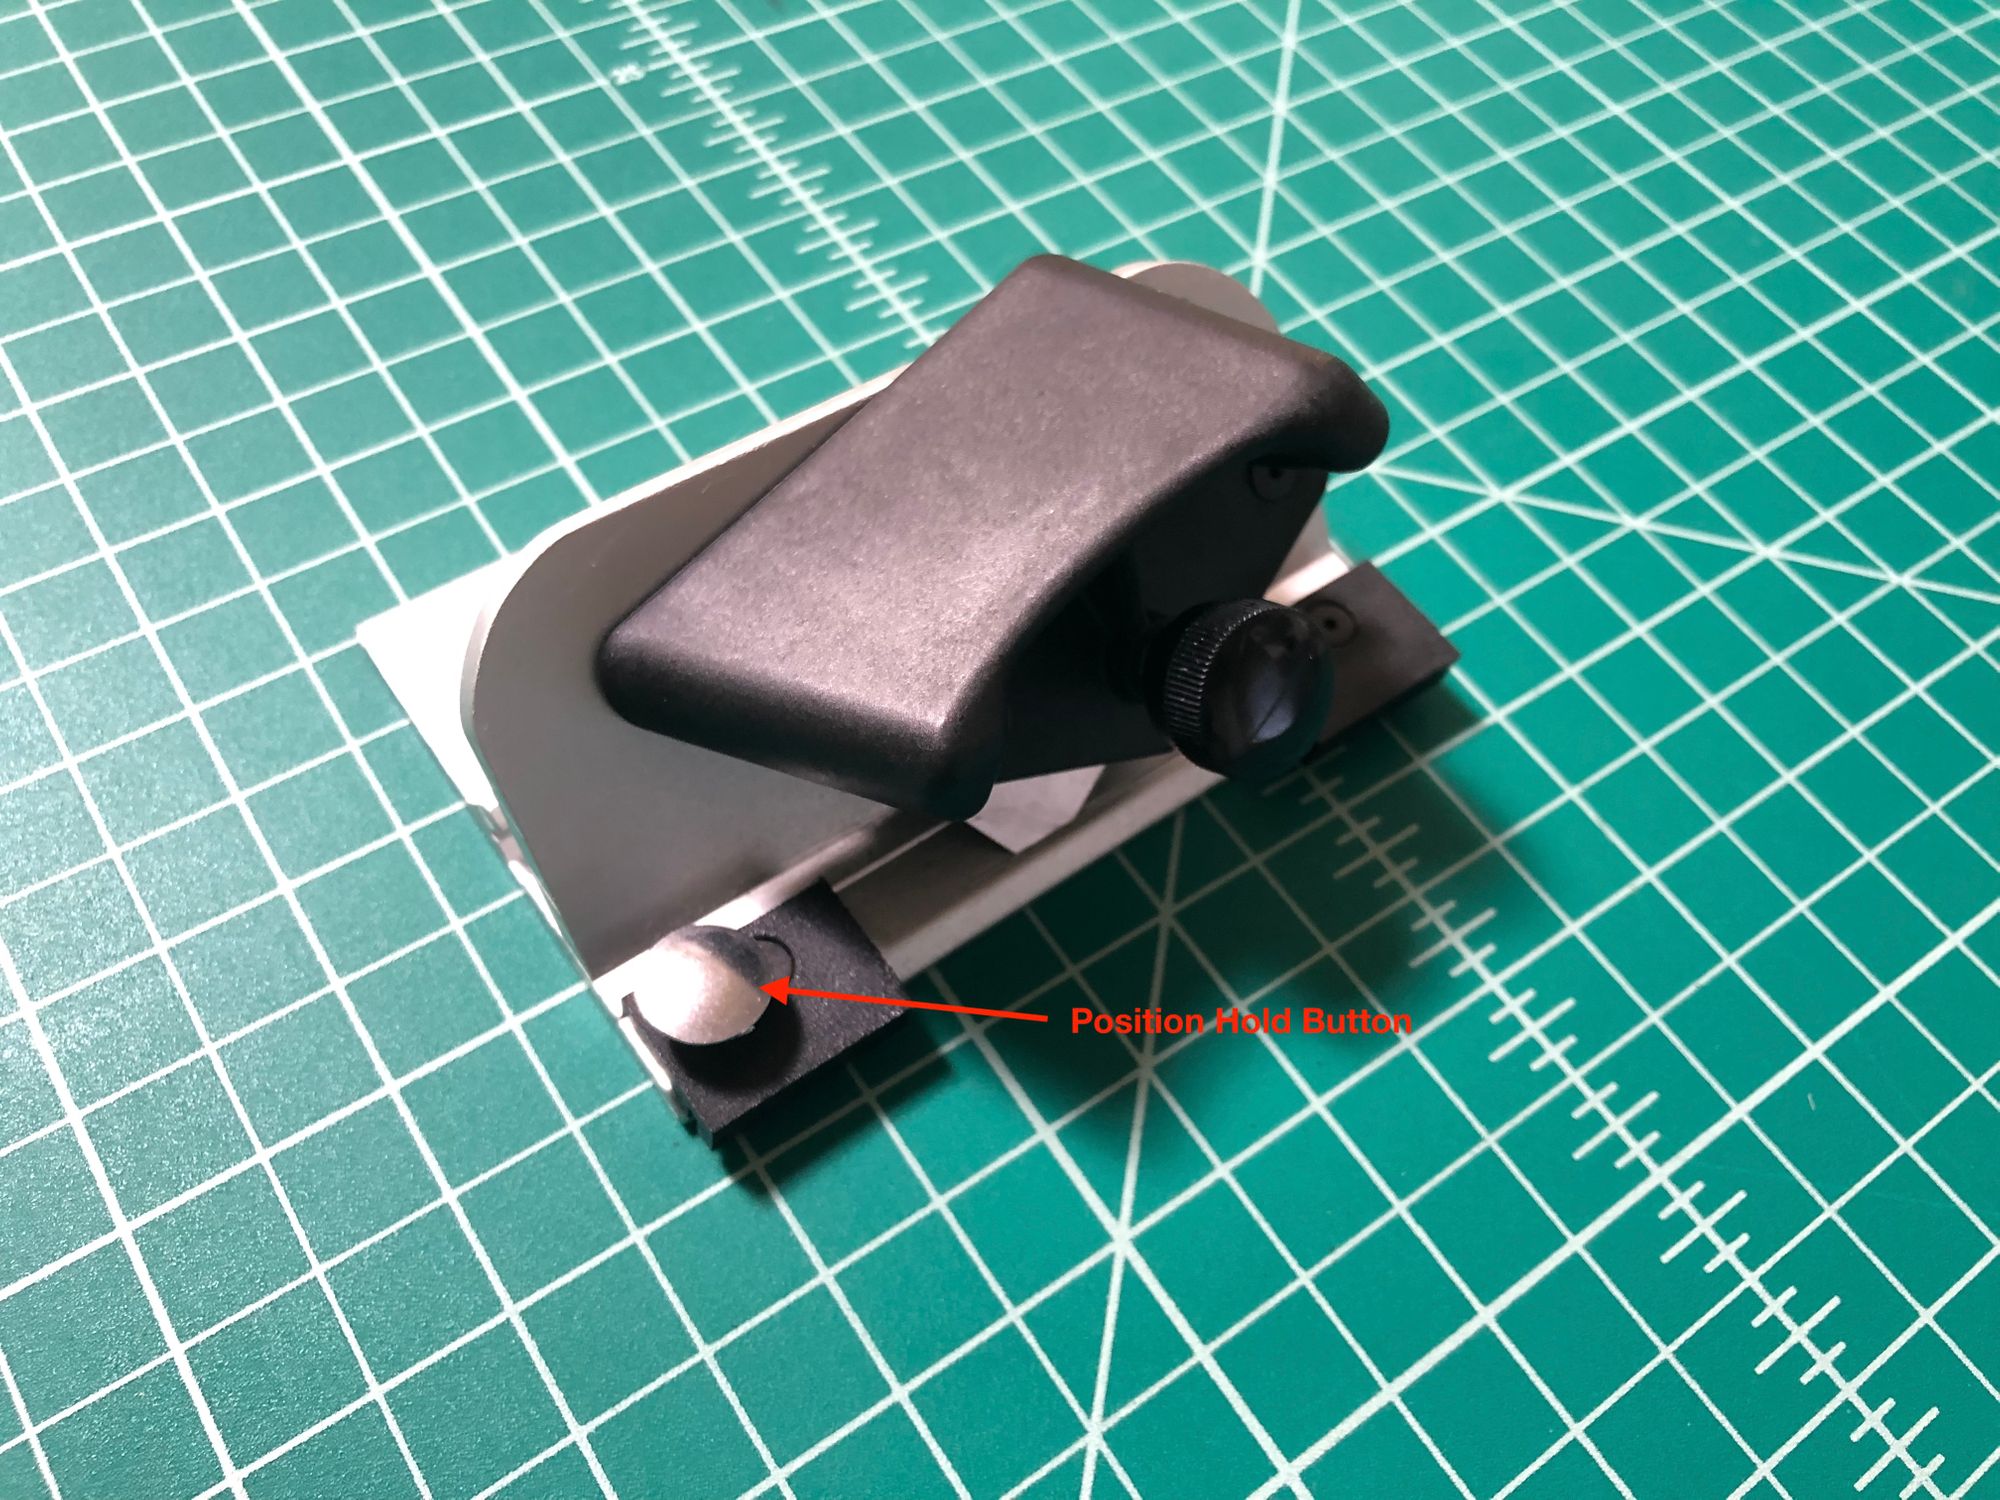
You want to be careful not to let the board shift as you push down on the blade. As the blade makes contact with the mat board, it tends to force the blade a little to one side. Some mat cutters have a button you can press before starting your cut that will prevent the mat cutter from shifting. If yours doesn’t have that, you’ll need to hold your mat cutter very firmly as you press the blade down to ensure it doesn’t move from the starting location as it starts to penetrate the mat board.
After you’ve made the fourth cut, you should be able to lift up the mat board and have the window just fall out.
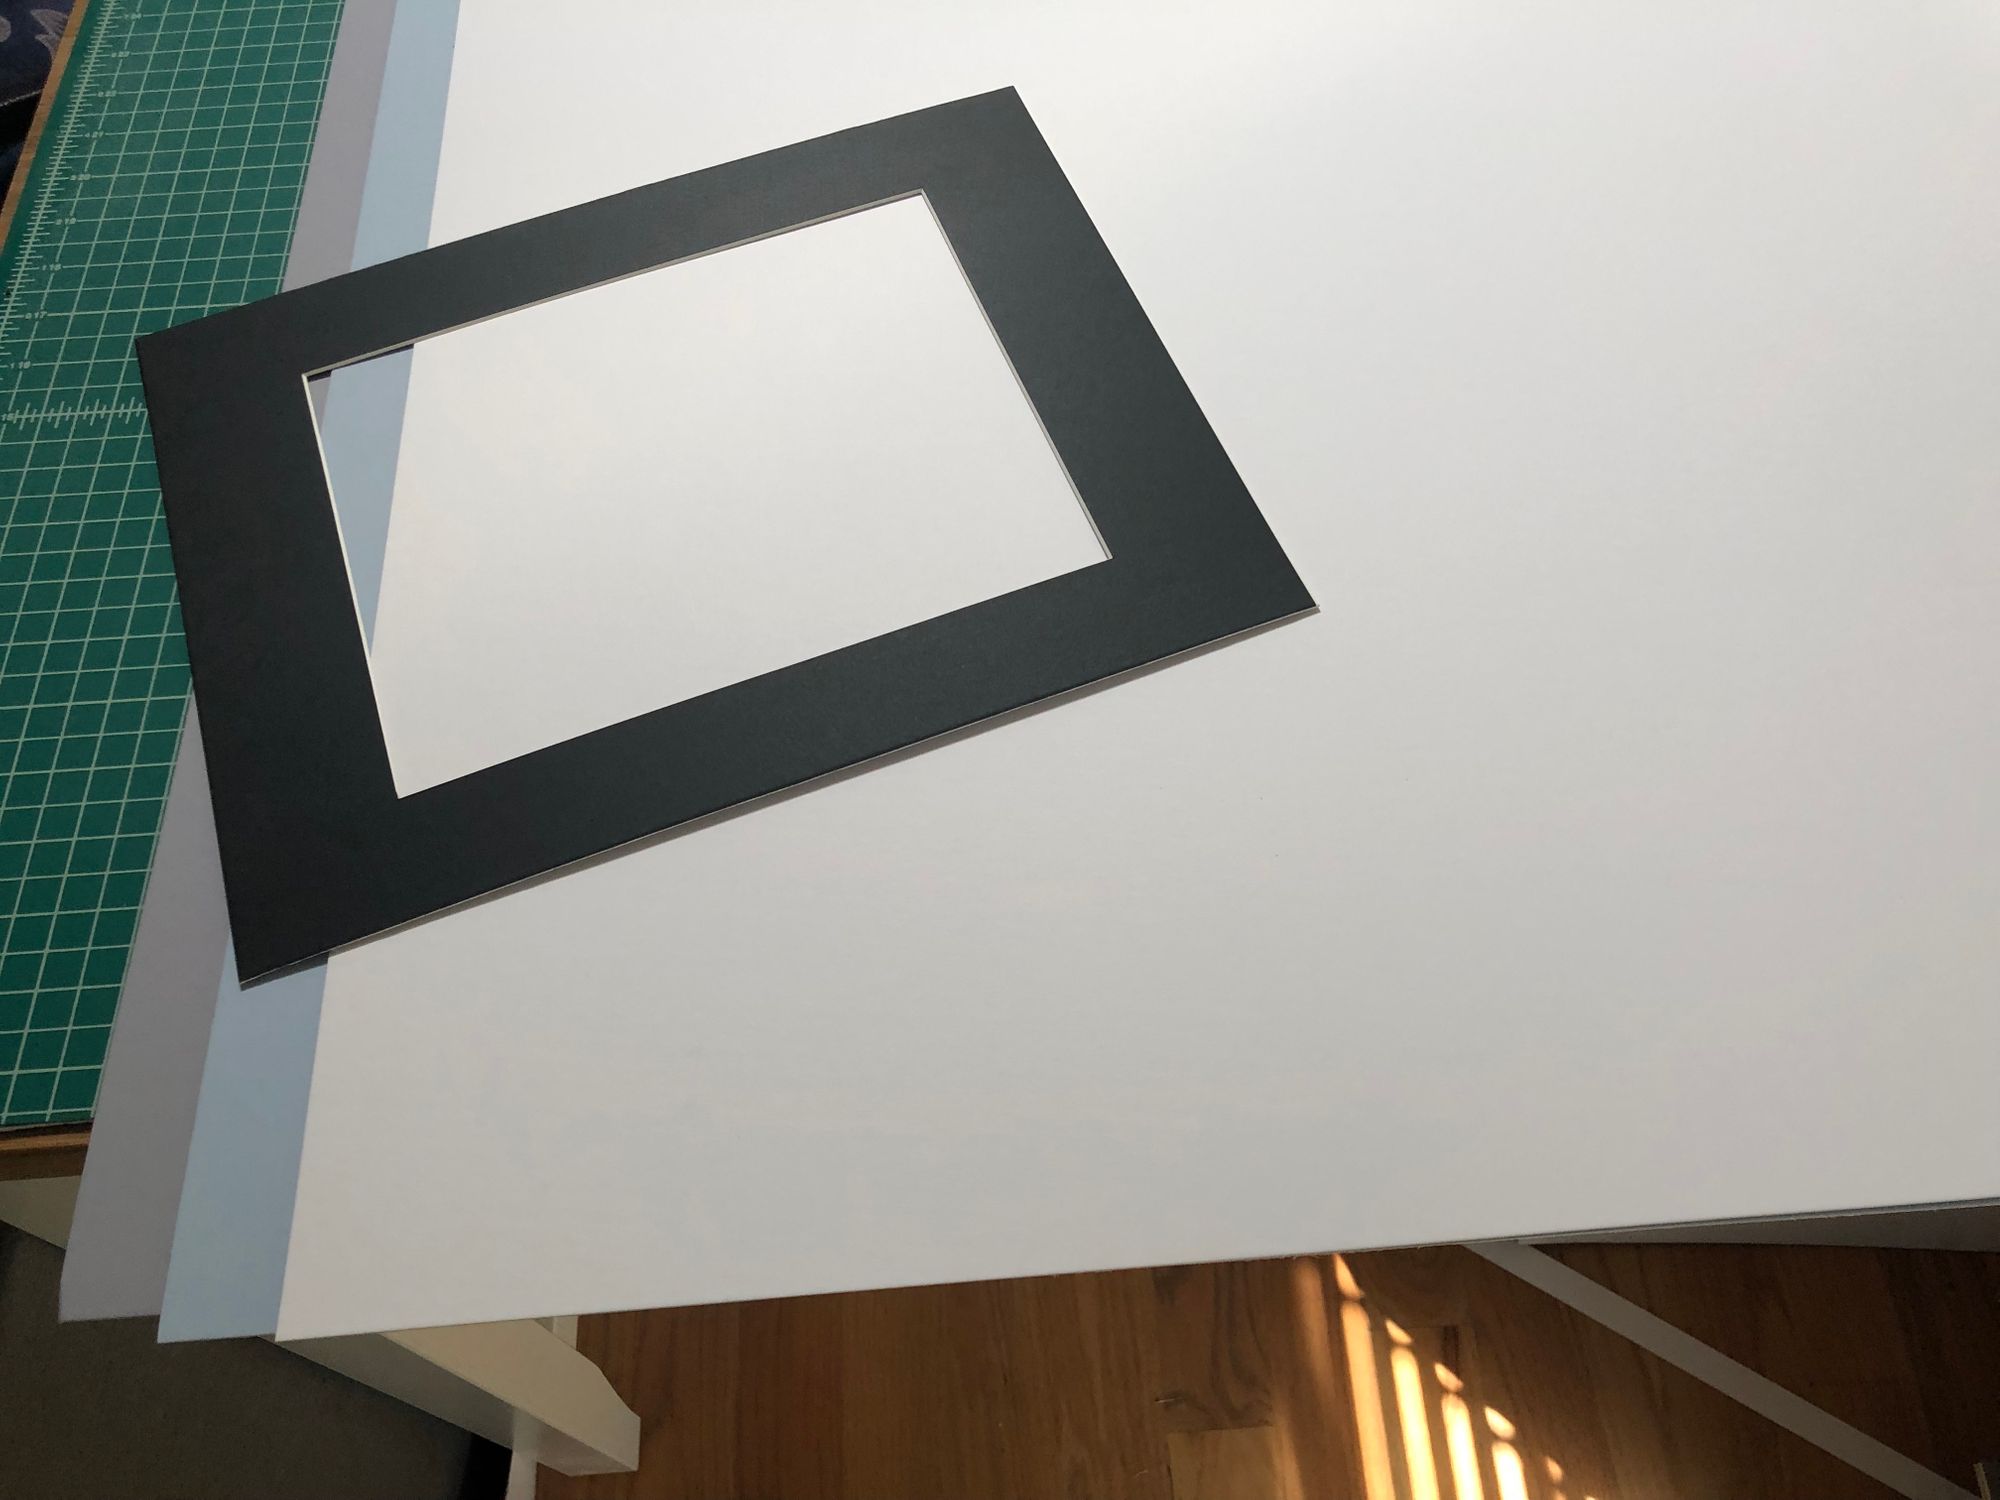
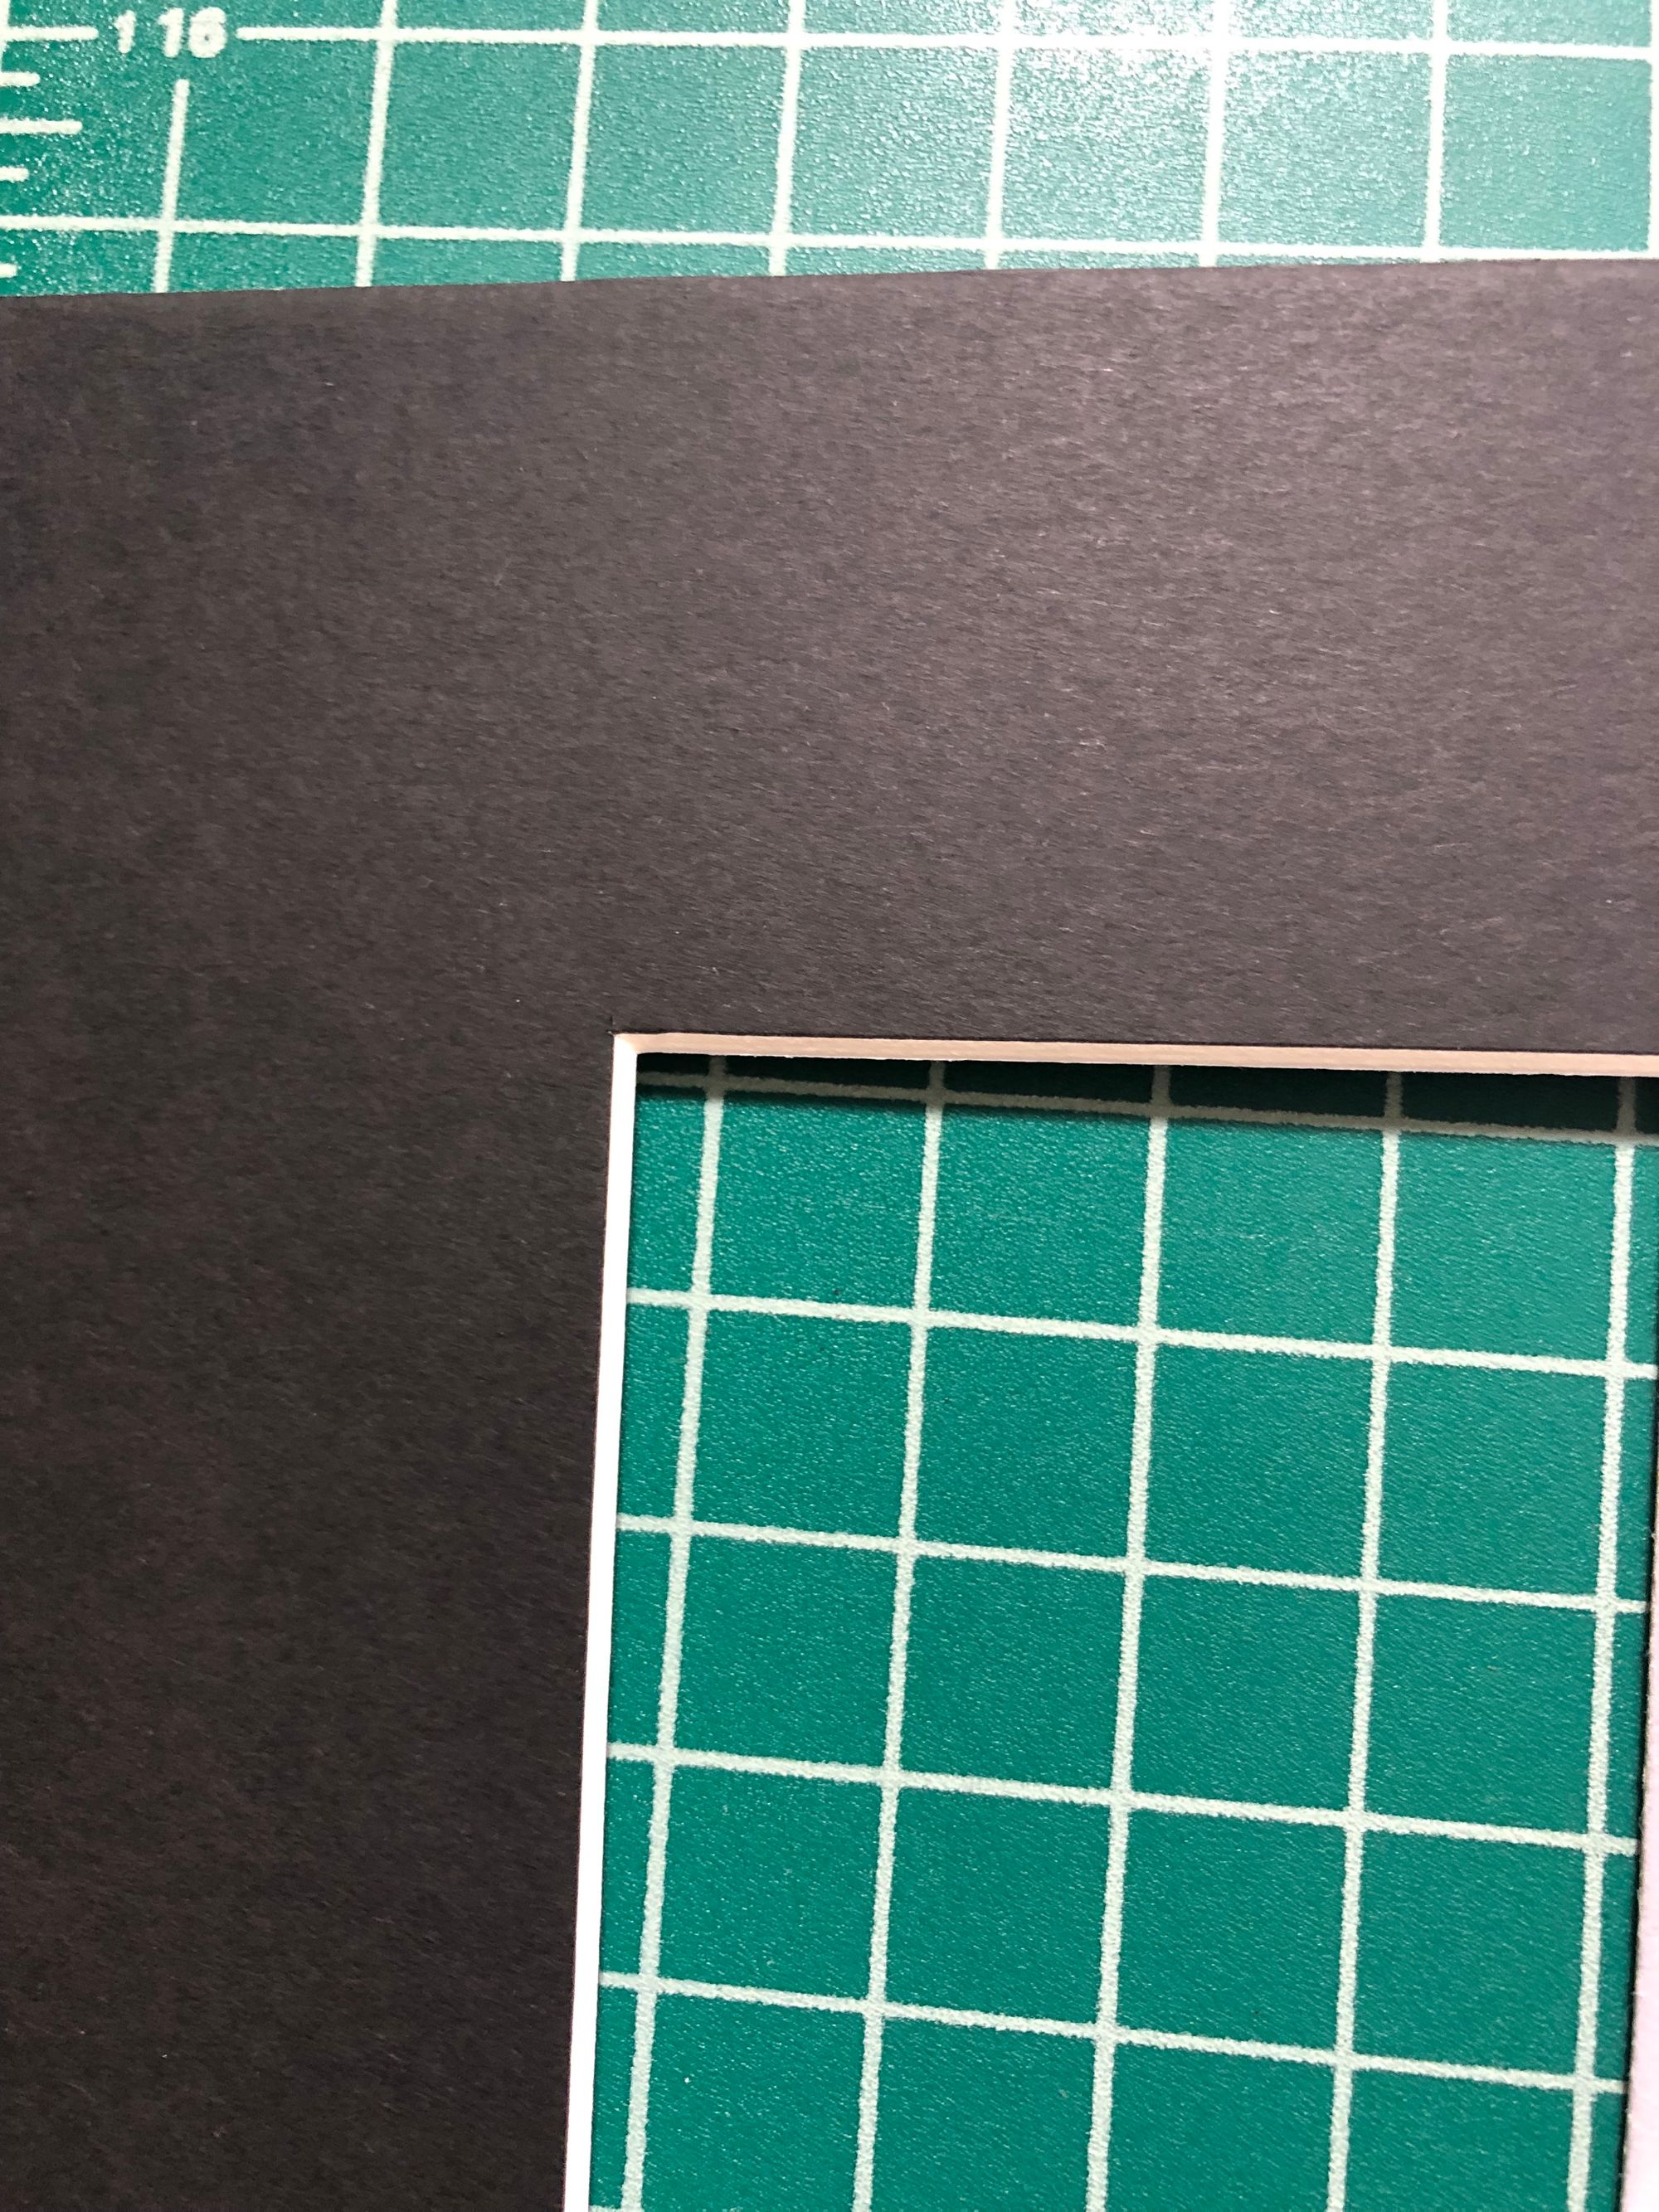
If you flip the board over, you should see a nice bevel cut window that allows some of the board’s core color to show. This is your front mat, ready to be assembled.
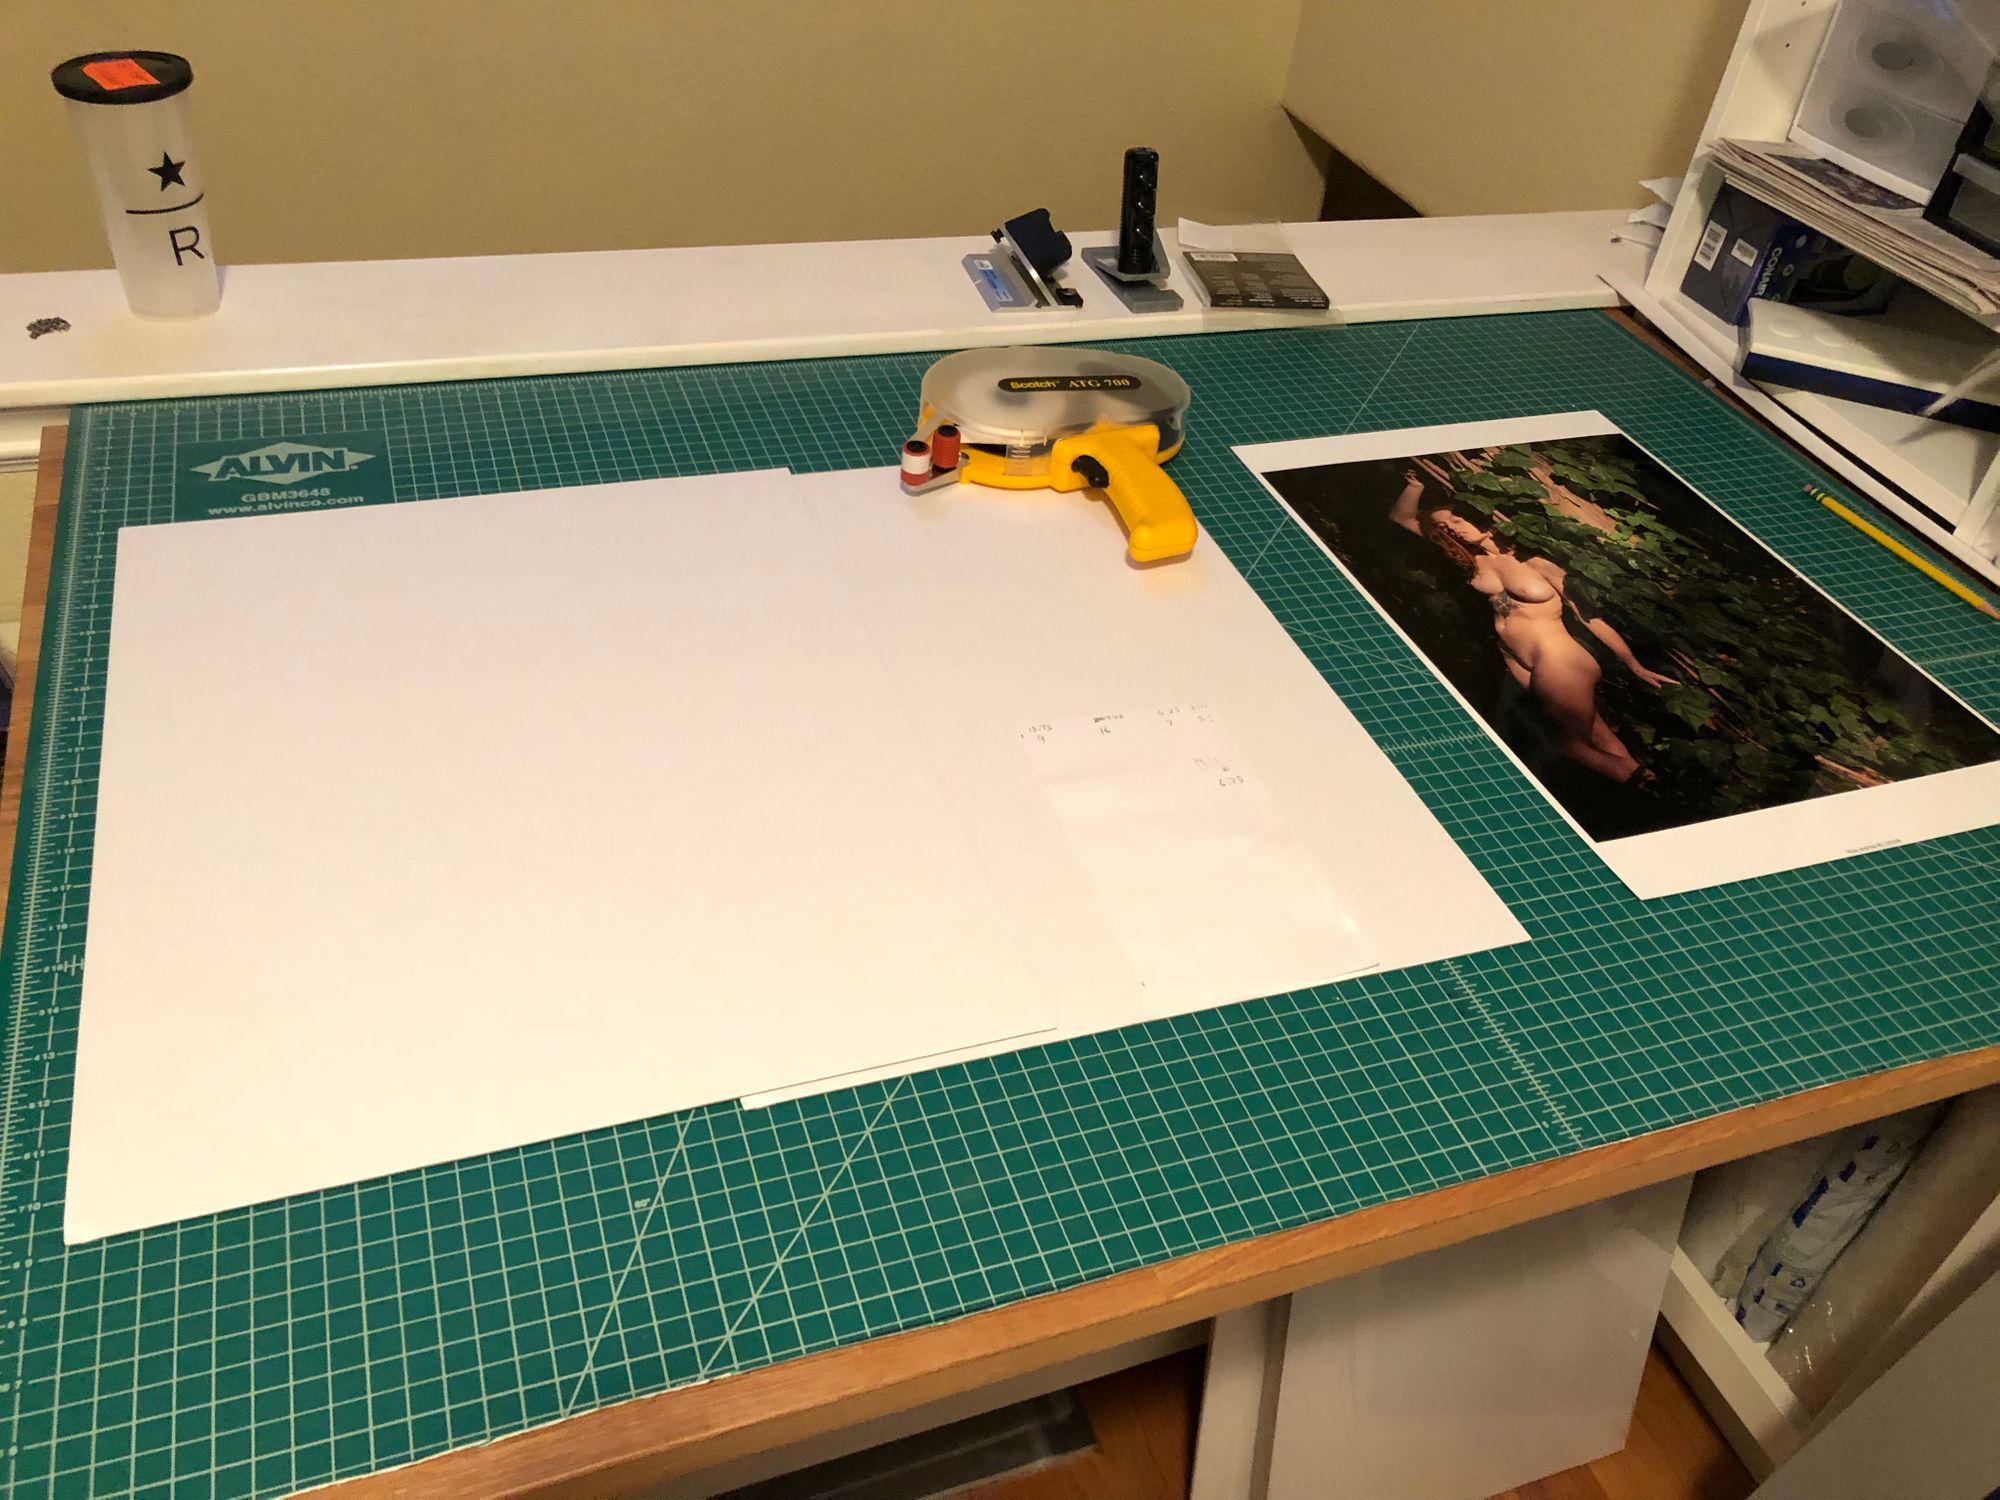
Positioning Your Photograph
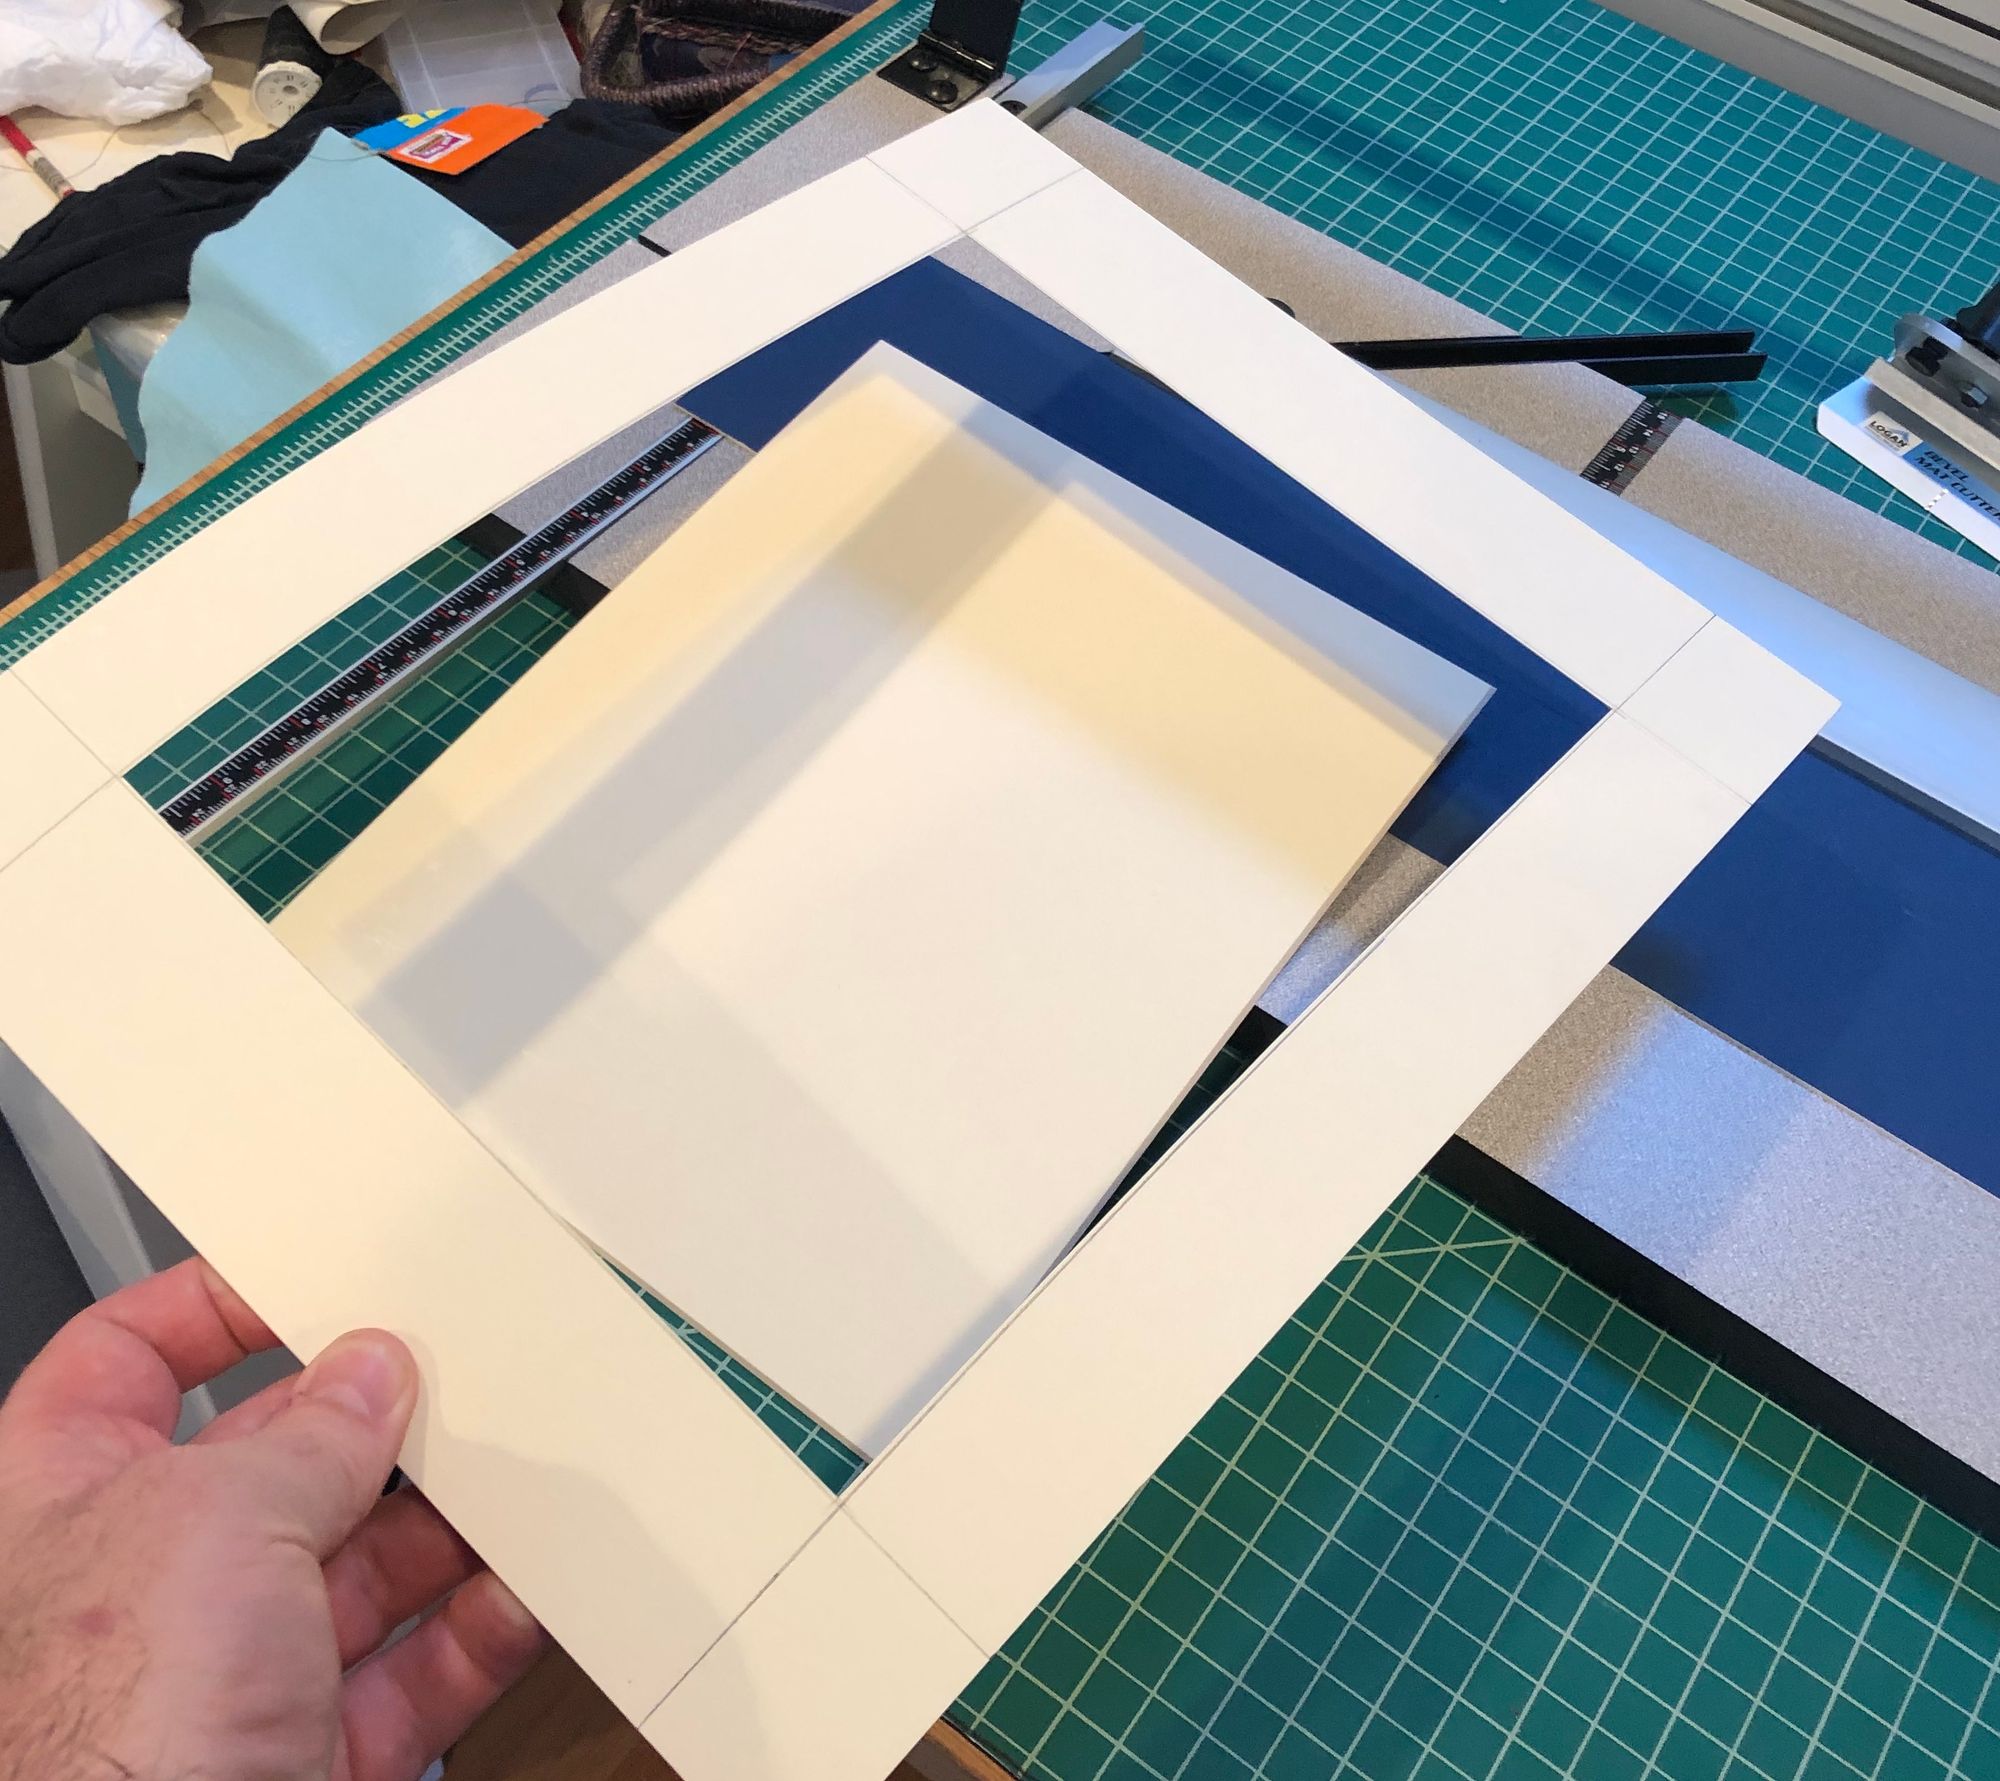
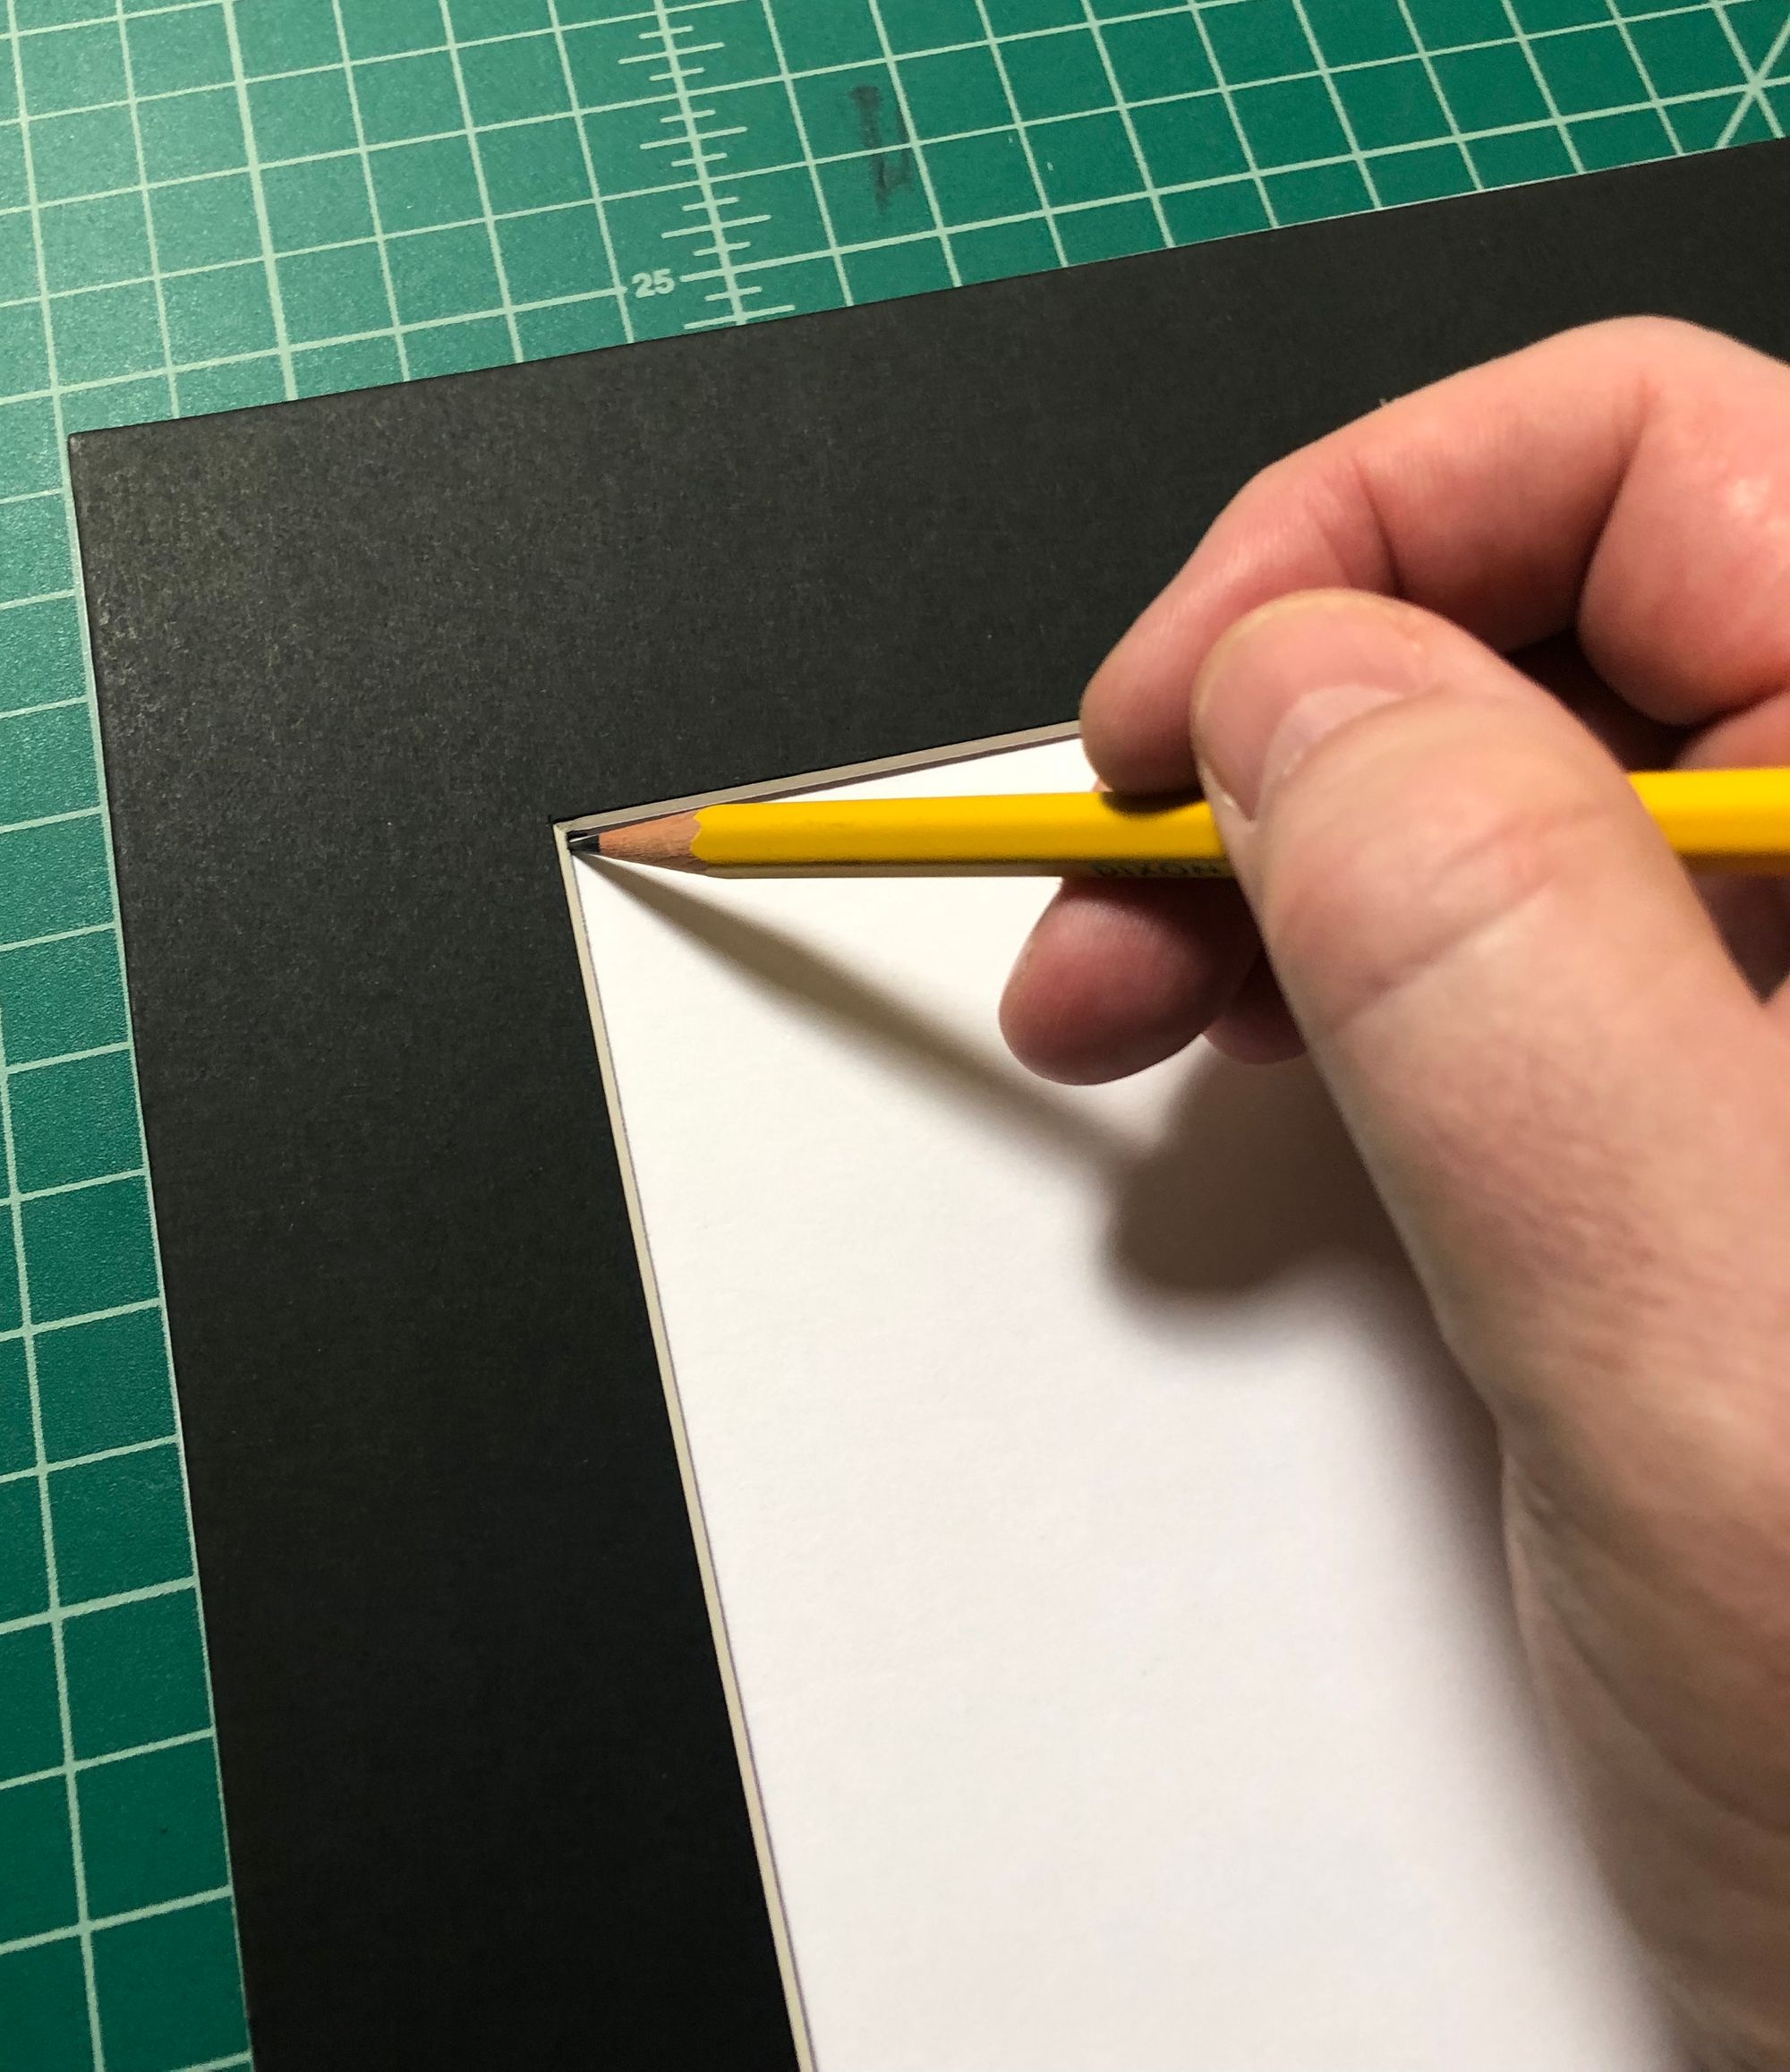
In order to position your photograph on the backer board, your best bet is to draw more guides. With the backer board, you’ll make your marks on the front of the board, rather than the back. I find the easiest and most reliable way to make guides for positioning the photograph on the backer board is to put the newly cut front mat on top of the back mat and align them. Once they’re aligned, take a pencil and mark each of the four corners of the window you cut. You’ll want to be careful not to get pencil on the bevel if you’re using a light color core.
Alternatively, you can simply draw the same guidelines you did in the previous step.
Once you have guidelines, place the photograph on the backer board and position it using the guidelines you drew. Once you’ve got the print aligned with your markings, drop a weight bag onto the print to hold it in place.
Before attaching the photograph to the backer board, put the front mat back on top and line it up with the backer board to make sure that the photo’s position is correct. If it’s not, make adjustments until it is, then remove the front mat again.
If you’re using mounting corners (and I highly recommend that you do), you can lift up each corner of the print, place a mounting corner on it, and then press it back down firmly to attach it to the back board. You may want to wear gloves during this step, especially when mounting larger prints, to avoid getting fingerprints or smudges on the print or mat board. If I use a glove, I typically only wear it on one hand because it’s hard to handle the mounting corners effectively wearing a glove.

If you use mounting tissue or transfer tape to attach your photo to the back mat, you can lift up one side at a time, lay down some adhesive, and place the photograph back down on top of it.
If you use spray mount, you’ll have to spray the entire back of the photo at one time, and then place it back on the backer board. With this option, you want to make sure that your guidelines are accurate before you start spraying. Praying might help, also.
The most important think to keep in mind during this step—regardless of how you’re attaching your print to the back board—is to make sure the photo doesn’t move. Even a small shift while affixing the photo could ruin the mount and print if you’re using a permanent adhesive. If you cut your window slightly smaller than your print, you have a little more wiggle-room to accommodate slight shifts.
Assembling the Mat
You’ve now got your front mat cut and your photo attached to the backer board. All that’s left is to assemble the mats. How you do that depends on whether you’re doing a flush mount or a hinge mount.
Assembling the Flush Mount
To assemble a flush mount, all you need to do is lay down some adhesive on one of the two mats. With transfer tape, I usually lay the adhesive down on the backer board, one strip the full length of each of the four sides. I don’t personally recommend spray mount or other adhesive options for assembling your mats, but any archival adhesive can be made to work. Transfer tape is nice because you have to actually apply pressure to make the adhesion permanent, so you can line up the mats perfectly before applying pressure and committing. With the other adhesive options, you’ll need to be very careful to line up the mats perfectly before letting the two sides touch each other.
Assembling the Hinge Mount
The hinge mount is even simpler to assemble: just place the front mat upside down above the back mat and press them together so the top of the bottom mat is touching the bottom of the upside-down top mat.
Note: Because a hinge mount can be opened at any time, you may want to assemble a hinge mount before placing your photograph on the backer board. That’s not an option when flush mounting, but with hinge mounting, I find switching the order makes easier to position the print correctly.
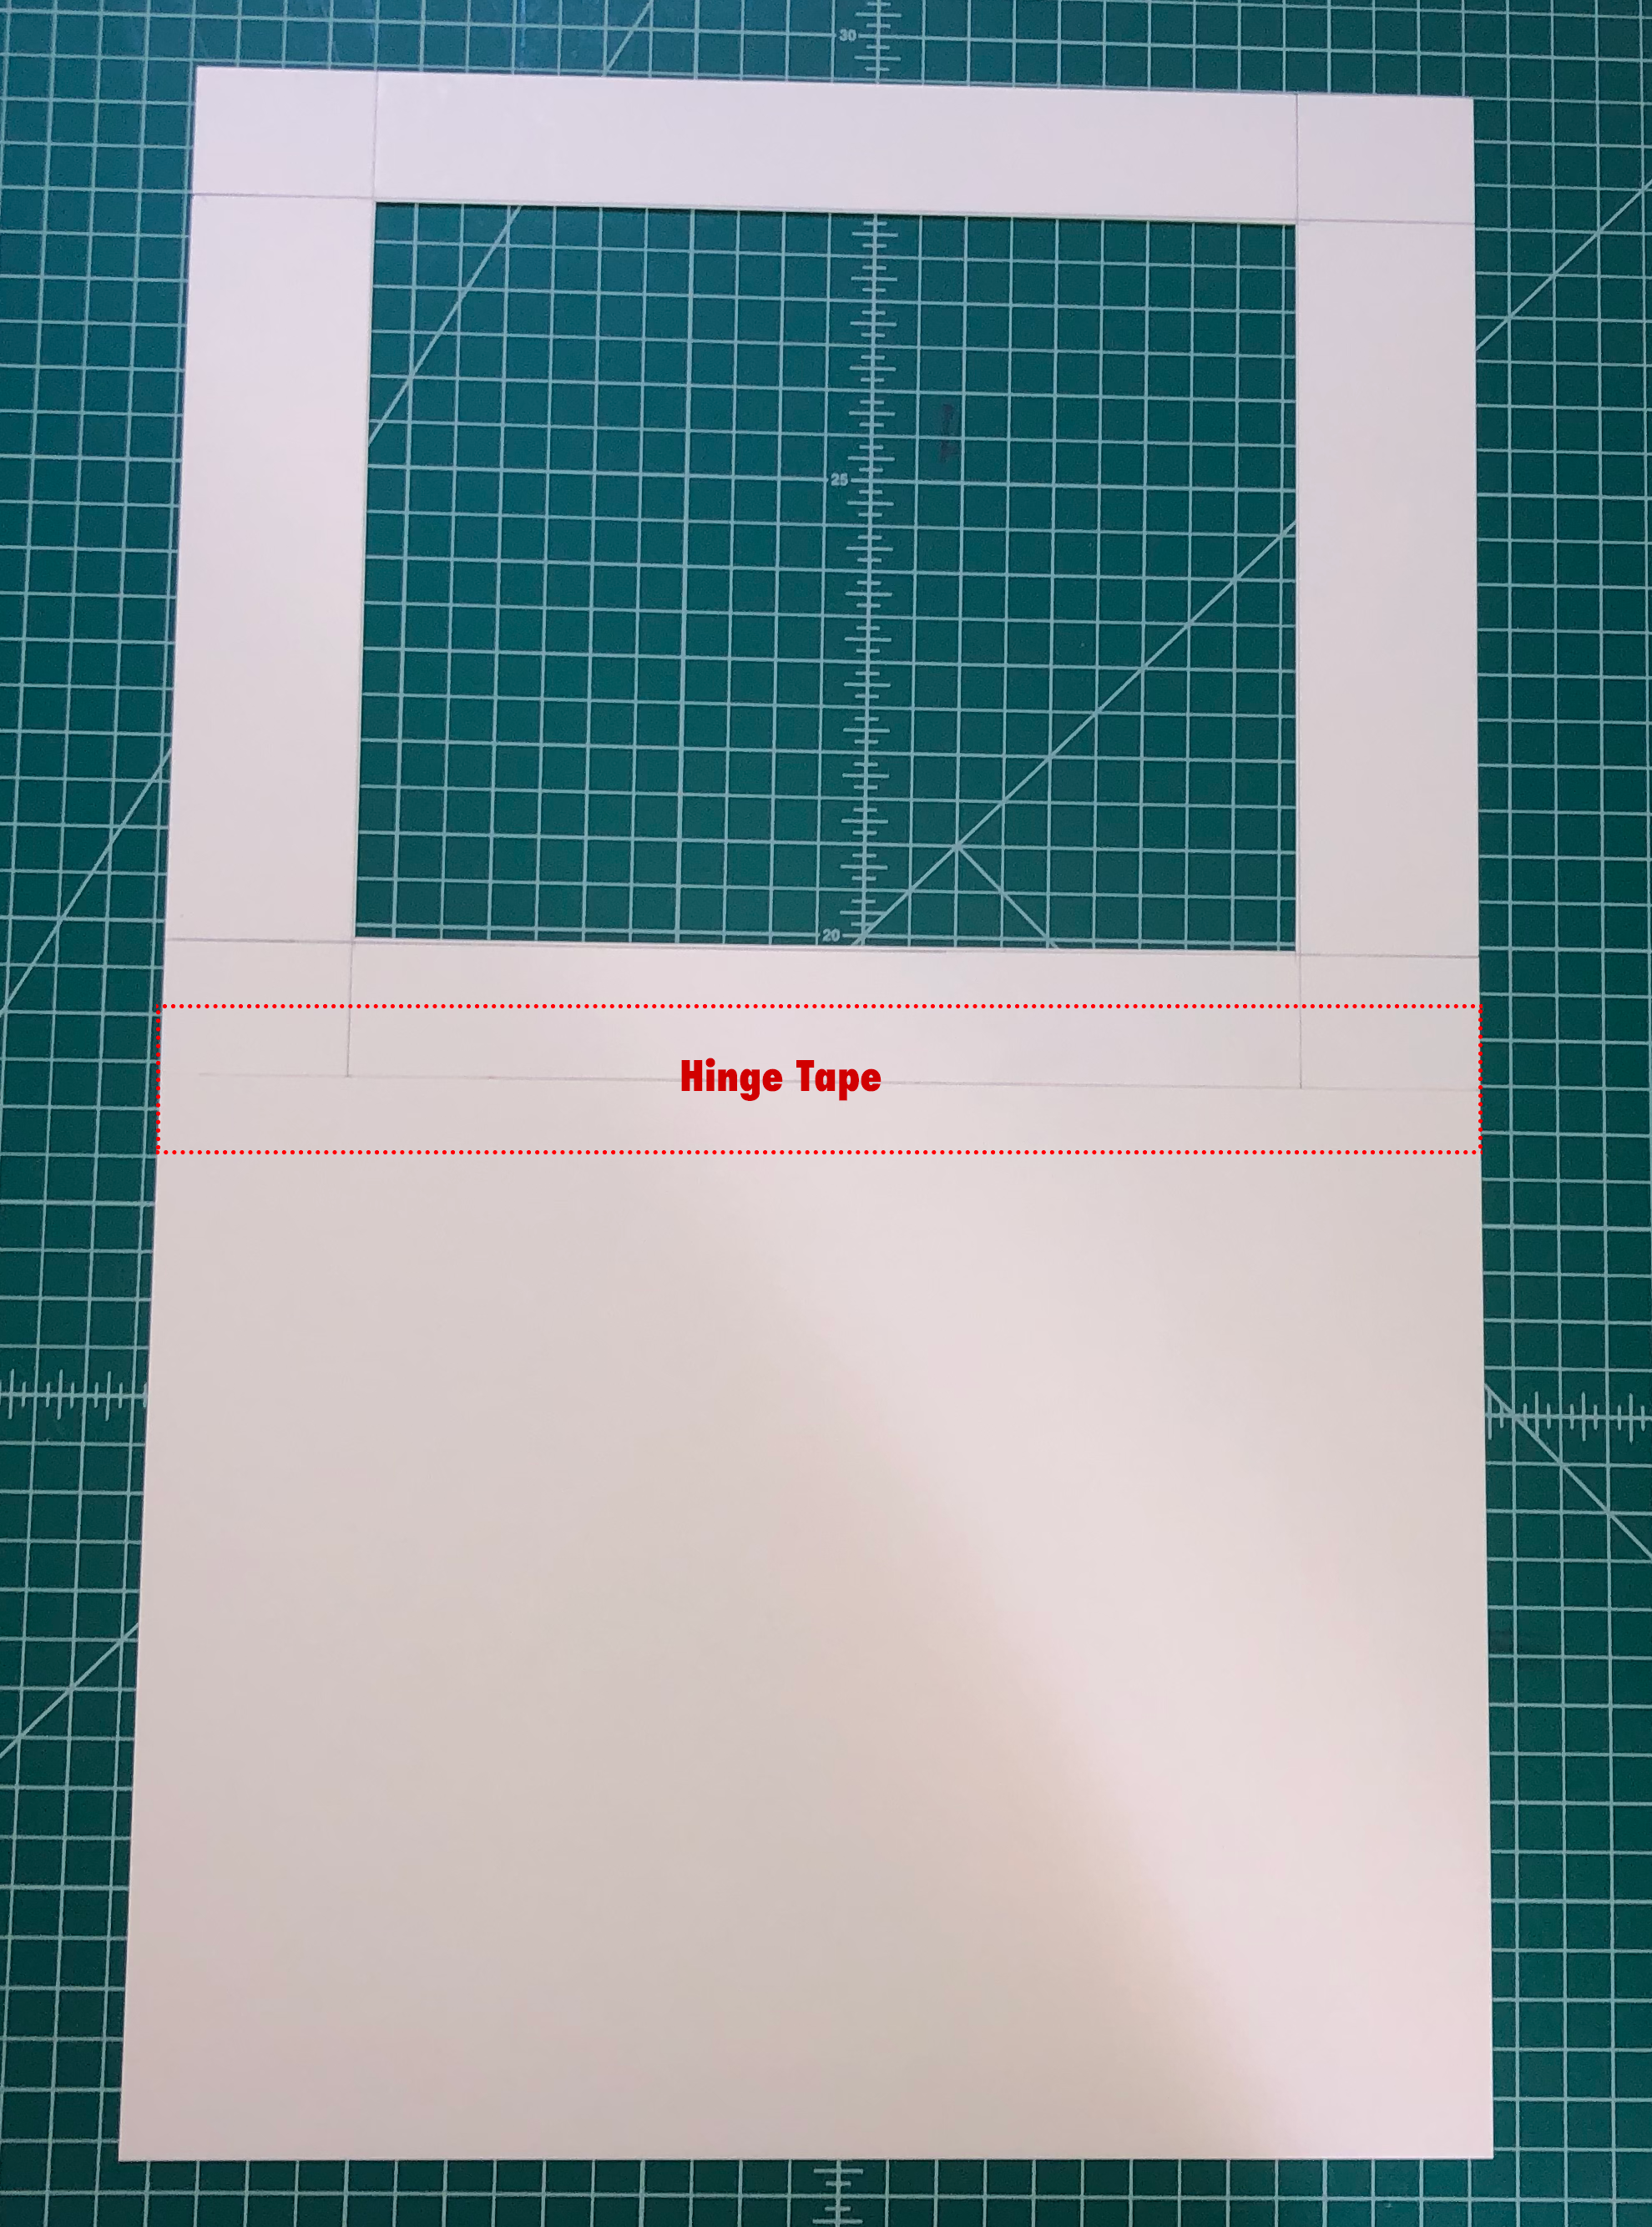
Once they’re lined up, cut a piece of linen tape that’s the same length as the top edge of the mat or, perhaps, just a tiny bit shorter. Apply the hinging tape so that it’s half on each of the mats and press firmly down the entire length of the strip of tape. This piece of linen tape creates a connection between the mats called a book hinge. Make sure you use a tape designed specifically for this purpose. Hinging tape is extremely sticky, strong, and hard to remove once attached. Attempting to create a book hinge from a less aggressive type of tape, like masking tape, simply won’t work well.
Believe it or not, you’re now done. You can fold the top mat down onto the bottom like a book cover (hence, the name), and your mat is ready to go.
Conclusion
It’s taken a lot of words and quite a few pictures to describe a fairly simple and straightforward process, but once you’ve mounted a couple of prints, you’ll be surprised at how quickly you’ll become comfortable with the process. There are, of course, far more advanced techniques you can experiment with if you want. Try searching the web for the term “French Matting” to find a lot of inspiration and ways to fancy up your mats by, for example, using more than one front mat with increasingly larger windows (double mat, triple mat, etc.), or by adding decorative borders—called french lines—which are drawn, painted, or even gilded borders around the window. There’s a very good web page containing information on advanced and historical matting and framing techniques on the Conservation Wiki right here, though it can often be quite technical.
For photography, the vast majority of images are mounted using a simple white or neutral-color mat with no additional decorations. Generally, the intention is to showcase the photograph, not to compete with it or overshadow it. But, the mat is part of the presentation, and if you’re so inclined, feel free to experiment with fancier mounting options. Just keep in mind if you’re ever going to display in galleries or at art shows, they will probably require your photographs to be mounted in a plain white mat with white core.
- Ply is used as a measure of thickness these days rather than an indication of how the board was made. While some boards are still made from multiple sheets of paper, many are produced from a single thicker layer. A board made from a single layer, but created at the same thickness as a traditional 4-ply board, will still be labeled as 4-ply.
- Alpha cellulose is the name of the specific type of cellulose found in wood.